
While you connect external devices the threat of data damage comes along. Multiple threats can hamper data security. And not all these threats can be managed by your Antivirus. Therefore, for extra care, you must take some precautionary steps. One of these precautions is to disable the USB port on your Windows device. USB ports are the most common source of malware or errors in your computer. Also, copying data on your USB device is easy and requires no extra permissions. Therefore, it is necessary to disable USB ports.
Hence the article deals with the simple options to disable or enable USB ports. Read the complete article to find out the most simple and quick alternative to disable USB port on Windows 10,11, 8, or 7 devices. Along with the methods to disable we have also specified how to enable USB port on Windows.
But before you find out these methods here’s a recommendation: Always keep your USB drivers updated. Although there are different methods available to update we recommend users to download driver updates instantly with an automatic tool.
How to Enable/Disable USB Port in Windows PC?
There are several ways through which an administrator can disable USB port on Windows PC. Here we discuss some of the most effective ones below. Along with disabling USB, we have also mentioned methods to enable USB port in Windows 11/10 blocked by Administrator.
Enable/Disable USB Port via Command Prompt
One of the most effective ways to disable USB ports in Windows 7, 8, and 10/11 is using the Command Prompt. Here are the steps that can help you to disable and enable USB port in Windows 10 using command prompt.
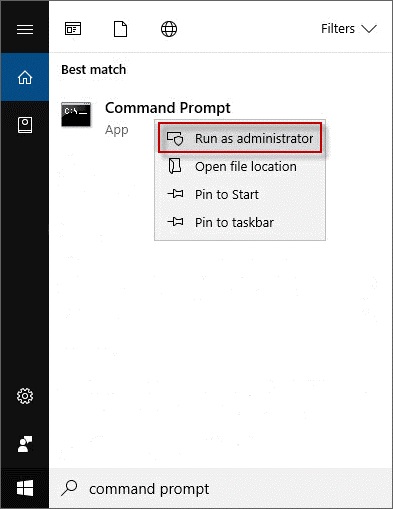
- Run Command Prompt as administrator via Windows Search box.
- Then, enter the ‘set devmgr_show_nonpresent_devices=1’ command and press the Enter Key.
- After that, type ‘start devmgmt.msc’ and press Enter.
- In the Device Manager, expand Universal Serial Bus controllers.
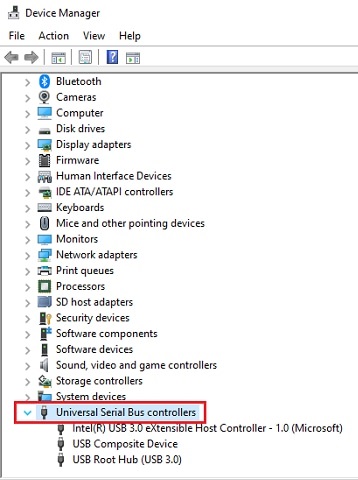
- Then, right-click on all of them and select Disable device.
To enable USB port in Windows 7, 8, and 10 again, you do not need to do much or something different. You can do it by following the same procedure, and at last, instead of selecting the Disable device option, choose Enable device.
Block USB port in Windows 10 via Group Policy
If you are using Windows 10 pro, then this method is exclusively for you. It allows you to block USB port in Windows 10 via Group Policy. However, the Group Policy Editor is only available in Windows 10 pro. Hence, we advise the users of some other versions of Windows to check some other methods mentioned in this post.
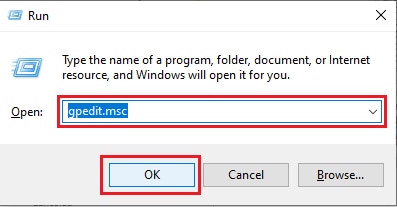
- Launch the Run command with the help of Windows key + R key.
- Then, type gpedit.msc and click OK.
- Navigate to the below path:
Computer Configuration > Administrative Templates > System > Removable Storage Access - Then, double-click on the Removable Disks: Deny write access policy which is available on the right side of the Window
- Now, click Enabled, which is available on the top-left side of the Window.
- Select Apply.
- After that, click on OK to finish it.
- Exit from the Group Policy Editor.
- At last, to implicate all the Group Policy Editor changes, reboot the PC.
However, if you want to enable USB blocked by Group Policy Editor on Windows 10/11, then you have to follow the same steps. But instead of selecting Enabled, you have to choose Disabled.
Enable/Disable USB Port via Registry Editor
The administrator can even disable the USB port by using the Windows Registry Editor. Here are all the necessary steps that you need to follow to block the USB port via Registry Editor.
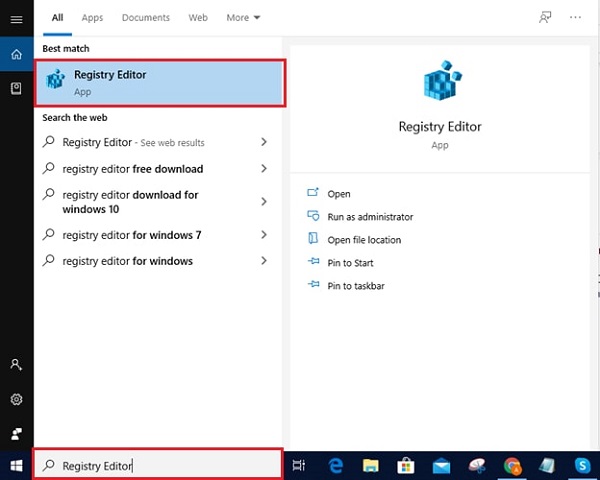
- Launch the Windows Registry Editor. If you are not so familiar with the Windows shortcut keys, then you can use the Search box to open it.
- Navigate to the path mentioned below:
HKEY_LOCAL_MACHINE\SYSTEM\CurrentControlSet\ Services\USBSTOR
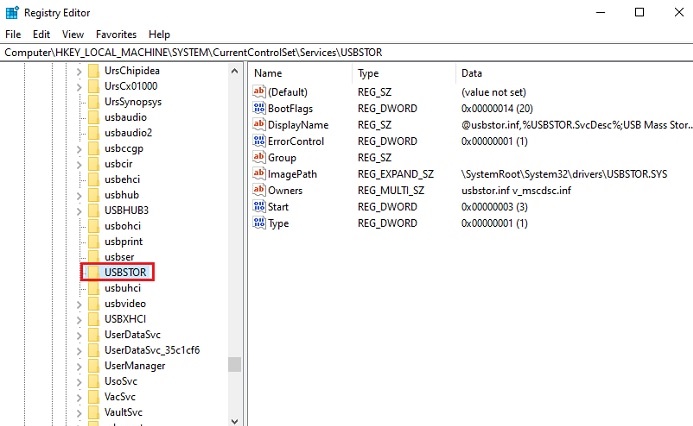
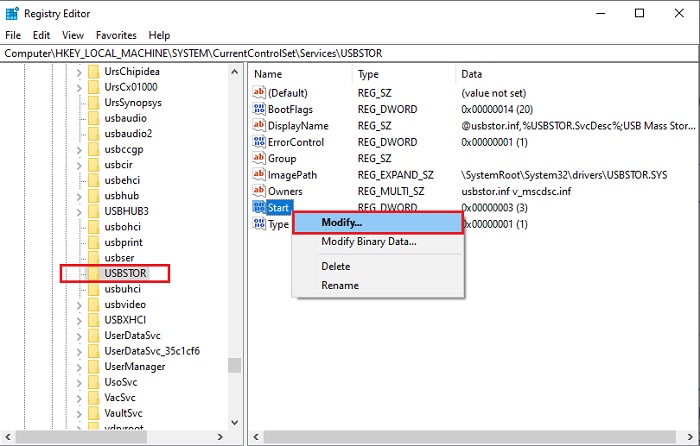
- Find Start and right-click on it.
- Select Modify.
- Change the Value Data to 4 and click OK. It will disable the USB port.
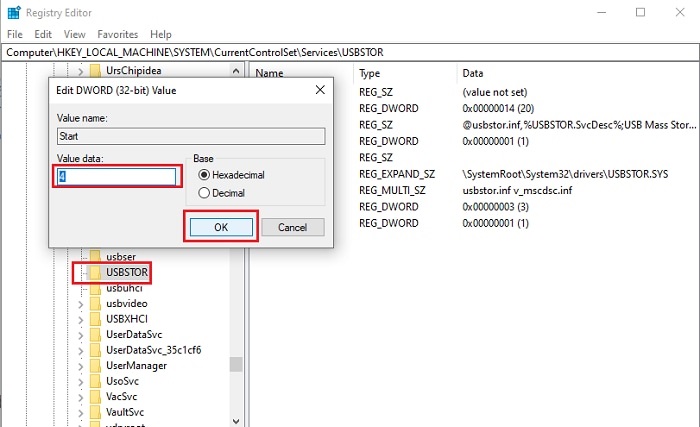
However, if you want to enable USB port in Windows 10 blocked by administrator, then you can do it by changing the value data to 3.
Use BIOS to Enable/Disable USB Port
Some of the PC manufacturers also allows you to make customizations to the BIOS. Hence, you can also use it to disable/enable the USB port of your Windows 11,10, 8, or 7 PC. You can follow these instructions to do it safely.
- Enter the BIOS mode.
- Select the Advanced tab.
- Disable Legacy USB Support and USB functions.
- Use F10 to exit BIOS.
- Restart your PC.
Using this method you can also turn off USB power after shutdown.
Use A Third-Party Application to Enable/Disable USB Port
If you are not interested in following the manual methods to disable the USB port, then you can try using a third-party application to lock the USB port with a password. It will provide you an additional security as nobody will be able to access your USB drives without your permission or password. It can prevent you from the risk of data theft.
However, you can also unlock USB port whenever you want. It is quite easy to lock and unlock USB ports with passwords using third-party applications.
Uninstall USB Drivers
If you want a strong solution to disable the USB ports of your PC, then we recommend you to uninstall the USB drivers. This will lead to a complete stoppage in the functioning of your USB ports. You can do it by following the steps mentioned below.
- Go to Device Manager.
- Expand Universal Serial Bus controllers.
- Then, right-click on all of them and select the Uninstall device option.
- After that, mark ‘Delete the driver software for this device’ and click OK.
However, if you want to get your USB drivers back and enable USB port, then we recommend you to use Bit Driver Updater. It is the best software to download and update device drivers on Windows PC. It is also free to try. Here is the download button.

Although, if you want to know more about this best software to update device drivers, then you can refer to our Bit Driver Updater review.
Also read: No Audio Output Device is Installed in Windows 10,11
Enable/Disable USB Port on Windows
Hopefully, you have now learned how to enable/disable the USB port on Windows 11, 10, 8, or 7 devices. We hope the above methods were helpful in resolving your concern. If you know any more tips please enlighten us too in the comments below.
For more guides on technology updates and device drivers subscribe to our blog. Also to never miss any updates stay connected through our Facebook, YouTube, and Twitter handles.
