For all the Rust gamers, the “Rust not responding” issue is a serious one. As a result, we have provided a tonne of useful advice and solutions here to address this issue. To learn more, keep reading.
You must be familiar with Rust if you enjoy playing survival-themed video games. It is one of the most well-liked multiplayer survival games on PC right now. However, Steam Early Access first made the game available back in 2013. But in 2018, or a couple of years ago, Rust had its complete release. The game has gained popularity since its release for being a DayZ clone (a well-known mod for ARMA 2), but recently, many players have complained about the Rust not responding issue.
Why is Rust not Working
There are a lot of reasons behind the cause of rust not working properly. Sometimes the solution can be as simple as restarting the computer. In other cases, the user may have to make some system changes to run the rust properly.
But before going over the solutions to the problem, it is suggested that the user starts by following some easy steps to ensure the working. If still, rust fails to work properly; the user should move on to the next alternative.
To help the users from getting out of this trouble, today we have come up with this guide.
Make sure whether your computer meets the system requirements of the game or not. Below are the minimum system requirements for running and playing Rust on Windows PC.
System Requirements
Operating System: Windows 7 64bit or later version
Computer Processor: Intel Core i7-3770 / AMD FX-9590 or better
RAM: 10 GB
Graphics Card: GTX 670 2GB / AMD R9 280 or better
Free Storage: 20 GB available space
If your PC fulfills all the above requirements and you are still facing the Rust crashing or not responding issue on it, then you may proceed with the below fixes.
Best Solutions To Try If Rust Is Not Responding
Here are the solutions that you can try if you encounter a Rust not responding issue while playing the game on your Windows 7, 8, or 10 PC.
Solution 1: Reboot Your PC
Sometimes, you just require to refresh everything to make a software or game function properly. And to refresh the system, what is better than a quick PC reboot? Hence, to fix the Rust client not responding problem, you can also try restarting your computer.
Once you have performed the system reboot, launch the game to check whether it is functioning properly now or not. If still, the Rust keeps not responding, then try the other fixes mentioned below.
Solution 2: Configure Power Options
Some programs require a high-performance power plan to function properly. And if your power plan is set to the Balanced option, then you might face problems using the high-performance requiring software. It also applies to Rust. Sometimes you may encounter the Rust server not responding while joining or loading due to your balanced power plan. In that case, you can easily resolve the issue by changing the power options of your computer. Below are the steps that you require to configure power options.
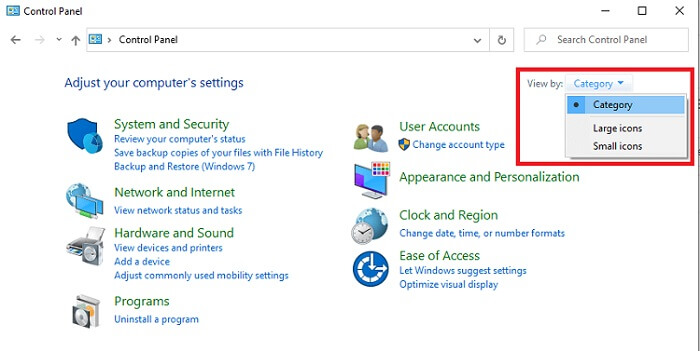
- Open the Control Panel of your Windows computer and select view the options by large icons.
- After that, scroll down and choose Power Options.
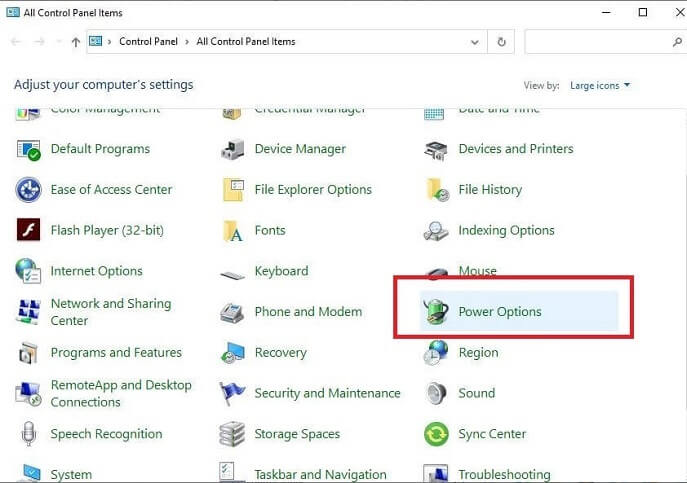
- Then, look for the Change plan settings options and select it.
- Now, click the Change advanced power settings button.
- Open the power performance drop-down menu by clicking on it.
- In the menu, click on the High-Performance option.
- At last, choose OK and close everything.
- Reboot the system, and after that, launch Rust to see if the fix worked or not.
Also read: How to Fix Roblox Ping So High Problem
Solution 3: Try Repairing EasyAntiCheat
EasyAntiCheat is a service that automatically gets installed on your PC when you download and install the Rust game. Sometimes it gets corrupted and may create rust clients not responding to problems. Hence, you should try repairing it to get rid of the Rust not responding situation. Below are the instructions that can help you to repair EasyAntiCheat correctly.
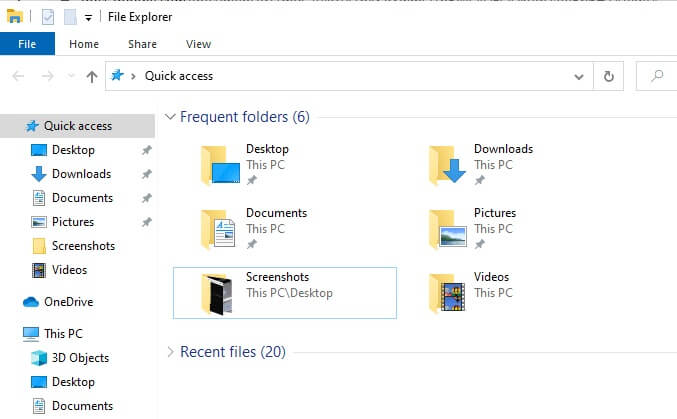
- Open the Windows File Explorer. You can do it by pressing Windows Key on your keyboard along with the E key. Or you can also click on the File Explorer icon available on your taskbar.
- After that, use the search box available on the top right side of the File Explorer window and search easyanticheat.
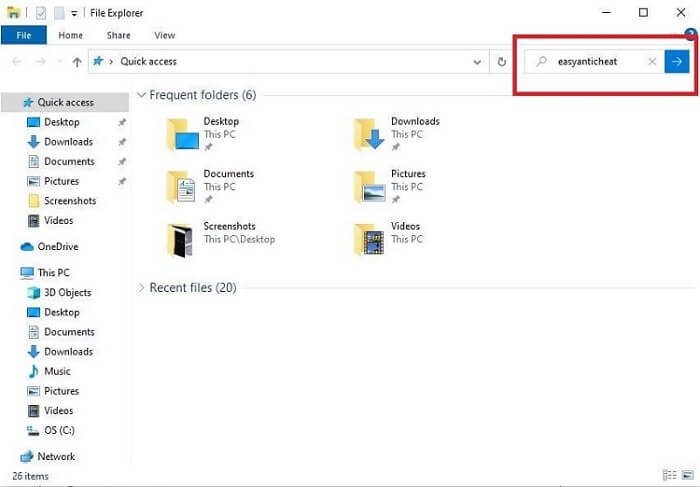
- Then, from the results, select the Easy Anti Cheat setup file and right-click on it.
- Now, choose the Run as administrator option from the context menu.
- In the Easy Anti Cheat setup window, expand the list box and choose Rust.
- At last, choose the Repair Service option.
- Once you have repaired the Easy Anti Cheat service, relaunch the game and check if it is responding correctly or not.
Solution 4: Configure Processor Affinity
Configuring the Processor Affinity may also be a great solution to resolve the annoying Rust not responding issue. The reason for this is that sometimes programs are unable to use the required potential of your system or CPU. In that case, you may encounter several crashing and freezing issues with those apps.
Hence, to fix it, you require to configure the Processor Affinity. You can do it via Windows Task Manager. Here are all the steps that you should take to do so.
- First of all, you have to launch the game, i.e., Rust, on your PC.
- Then minimize it by using the Windows logo key of your keyboard.
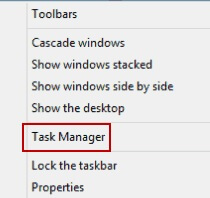
- After that, open the Task Manager. If you are using the Windows 10 operating system, then you can open the Task Manager by right-clicking on the taskbar and then selecting Task Manager. You can also use the Ctrl, Shift, and Esc keys on your keyboard altogether to open the Task Manager window.
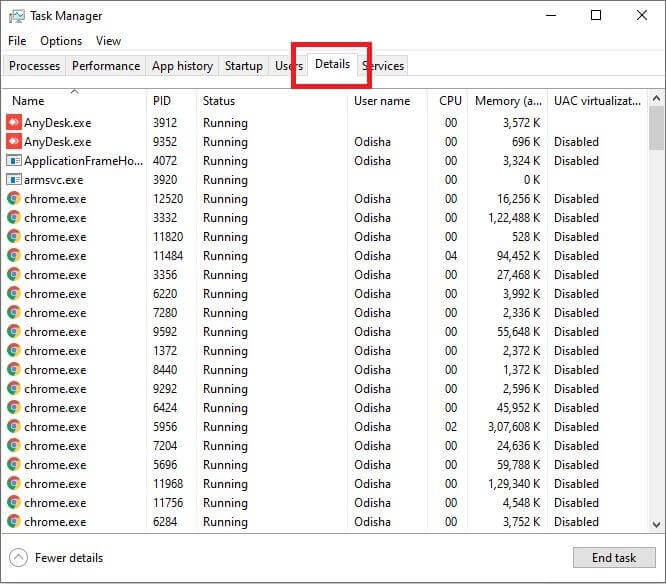
- Now, in the Task Manager, go to the Details tab.
- Find Rust and right-click on it.
- After that, choose the Set affinity option.
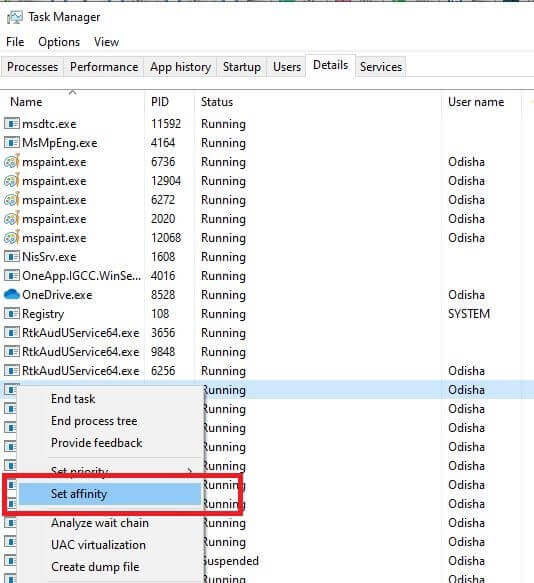
- Select all the processors and then click the OK button.

Now, relaunch Rust and check if the fix has worked or not. If the Rust client is still not responding, then try the other solutions mentioned here.
Solution 5: Try Recommended Settings
Another way to treat the how-to-fix rust not responding issues is by trying the recommended settings. Rust may also keep crashing on your PC due to incompatible system settings. Hence, you should try the recommended settings to fix the Rust server not responding issue while joining any server. If you do not know how to set the recommended settings, then follow these steps.
- The first thing that you have to do is to launch the Steam game launcher on your PC.
- Then, from the games available, choose Rust and right-click on it.
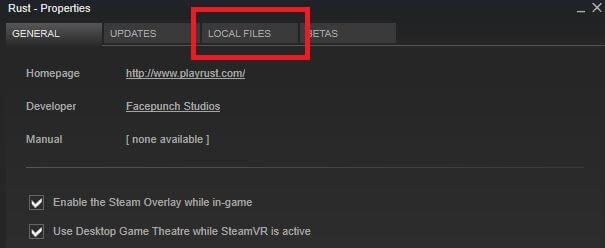
- After that, click on the Properties option.
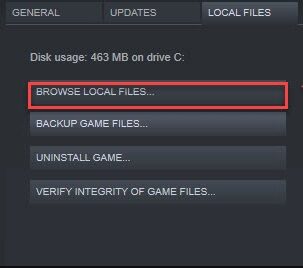
- Now, select Local Files.
- In Local Files, choose the Browse Local Files option.
- Then, go to the Rust.exe file and right-click on it.
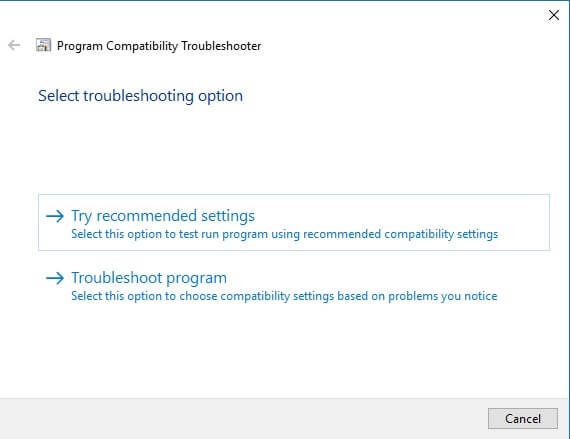
- Choose the Troubleshoot Compatibility option.
- After that, you have to select Try recommended settings from the options available.
- Now, click the Test the program button.
- Then, choose Next.
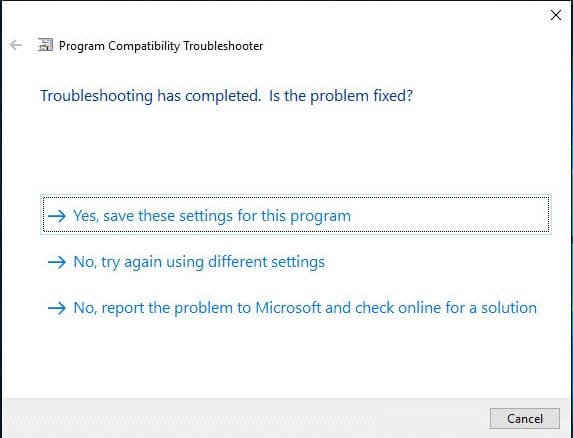
- Choose Yes, and save these settings for this program from the options available.
- After following all the above instructions, relaunch the game to check if it is responding now or if the problem still prevails.
Solution 6: Reinstall The Game
If you have not installed Rust properly on your computer, then it may later cause several issues and may also stop responding while you try to play it. Hence, in that case, you can get rid of all these issues by correctly reinstalling the game. Here is how you can reinstall Rust on your Windows PC.
- Launch Steam.
- Go to the game library and find Rust in it.
- After finding the game, right-click on it.
- Then, you have to choose the Uninstall option from Rust’s context menu.
- Now, select the Delete option when it asks whether you want to delete the game files or not, and after doing this, close the Steam launcher.
- Once you are done uninstalling Rust via the Steam launcher, open your Windows File Explorer. You can do it by pressing Windows Key on your keyboard along with the E key. Or you can also click on the File Explorer icon available on your taskbar.
- Now, navigate to the below-mentioned path.
C:\Program Files (x86)\Steam\steamapps\common
- Select the Rust folder and then delete it.
- Once you have deleted the Rust folder, download and install it again on your PC by following all the installation instructions correctly.
Solution 7: Increase Virtual Memory
Another effective solution if the Rust keeps not responding is increasing the virtual memory of your PC. It helps when the RAM is unable to store files of the program. Below are the steps that you can take to enhance the virtual memory of your computer.
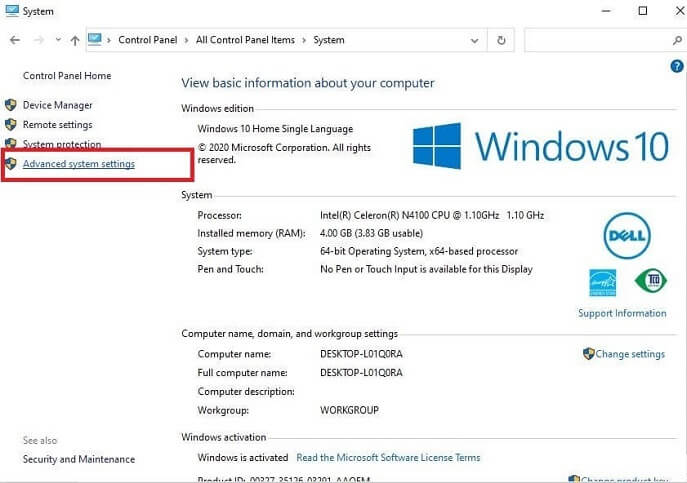
- Open the Control Panel of your Windows computer and select view the options by large icons.
- After that, scroll down and choose System.
- In System, click on the Advanced system settings option.
- In Advanced system settings, go to the Advanced tab.
- After that, click on Performance Settings.
- Now, you’ll see the Performance Options dialog box. In that box, click on the Advanced tab.
- In Advanced options, choose the ‘Change…’ option.
- Then, uncheck the ‘Automatically manage paging file size for all drives option.
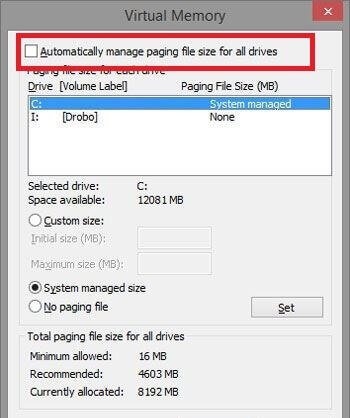
- Choose the drive in which you have installed your operating system.
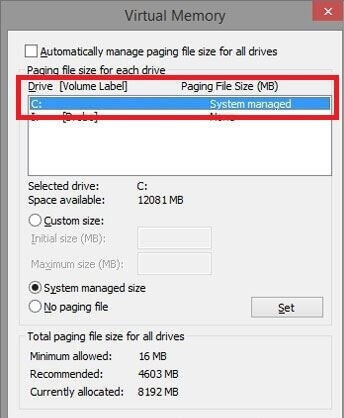
- And after that, make configurations to the initial size and maximum size.
- Click the Set button.
- Then, select OK.
After increasing the virtual memory, you have to remove the temporary files. Here is how you can do this.
- Use the Search box of your taskbar and type RUN.
- Then, open it.
- Type temp in the Run box and hit enter on your keyboard.
- Remove all the temporary files shown in the window.
- At last, reboot the system and launch Rust to see if increasing virtual memory has helped you to fix the responding issues of the game.
Solution 8: Update the Graphics Driver Of Your PC
How to fix the rust not responding to problems? Some of you might have tried all the ways and still are unable to fix the issue. But do not worry, as there is still a solution left that can resolve the Rust not responding issue. Games and applications that require high graphics performance may stop responding on your PC due to the problematic graphics driver.
Hence, if you want to play them again, you have to repair your system’s display driver. But it seems like a pretty tough task to do so if you are not technically sound. And even for the tech geeks, it is quite a time-consuming job to update system drivers. Updating the graphics driver can help a lot if the rust client is not responding or the rust server is not responding. There are two ways through which any user can update the graphics driver installed on the PC, which are as follows:
1. Manually through the ‘Device Manager’.
The best way to update the graphics driver on the PC is to use the built-in ‘Device Manager’. Follow these steps to install the latest update of the graphics driver through ‘Device Manager:
- Open ‘Control Panel,’ search for ‘Device Manager’, and launch it.
- Scroll down to your graphics driver, right-click on it, and then click on update driver.
- Select ‘Search automatically for updated driver software
- Then follow the steps as asked. Your driver will be updated within a minute
2. Automatically through a ‘Driver Updater Software
The second way to update graphics silver is by using a competent driver updater tool like Bit Driver Updater. Updating the driver through such driver updaters can help if rust keeps ‘not responding.’ It can save you from wasting your time on the boring manual ways of updating your PC drivers. It can save you from wasting your time in the boring manual ways of updating your PC drivers.
Bit Driver Updater comes with a plethora of automatic and advanced features than can help you to take care of your system drivers effortlessly. Below are some of the functions of this driver updating program that are pretty useful.
- Provides latest driver updates from the official sources with a single click
- Allows you to ignore some of the drivers while performing the update for the rest of the drivers
- Keeps your drivers secure by making a backup before updating them
- Even allows the users to set schedules for their future driver scans
If the above features have impressed you, and you want to use Bit Driver Updater to repair your drivers, then you can follow the below instructions.
- Click the button given below to download the setup file of the tool.

- Now, run the setup and install Bit Driver Updater.
- Then launch the program and click the Scan Drivers button.
- Wait for a while. You’ll get a list of driver issues that need to be fixed. Now, scroll to the display driver and click the Update Now button to get the latest version of it.

Also know: How to Fix “NVidia Graphics Driver Is Not Compatible With This Version of Windows”
Fixed: Rust Not Responding Issue
These are all the advice and techniques that might help you solve the aggravating Rust not responding issue. However, a bad driver is typically to blame for a number of these problems on Windows PCs. Therefore, it is generally recommended that you keep your system drivers up to date-and in good shape. And the Bit Driver Updater is the simplest method to use in order to accomplish this.
However, if you’ve previously upgraded your PC drivers and Rust still isn’t working properly for you, you can attempt any of the efficient workarounds listed above.
Additionally, if another solution has worked for you, please share it with the other readers in the space provided below in the comments area. If you enjoy reading such technical posts, you can also subscribe to our blogs.
