

Android Studio is among the various applications available for programming Android applications. It is a cross-platform IDE with all the features we need to create apps for Android devices. Also, it supports several operating systems, has a wide range of built-in functionality, and contains a variety of layouts for creating visually appealing GUI.
This tool took the place of the once well-liked Eclipse IDE tool in part because of its better qualities. JetBrains’ IntelliJ IDEA is the foundation of Android Studio.
Everything we require for Android development is included in this IDE. Android Studio system enables you to create numerous build variations for various devices from a single project. Gradle powers the Android Studio build system.
This informative article will guide you through the steps on how to install Android studio on ubuntu 20.04. Read ahead to know the proper and systematic steps.
Ways to Install Android Studio on Ubuntu
Here are the easy methods to download Android studio for ubuntu and to install ADB ubuntu easily. Follow them on your system.
Way 1 – Install Android Studio Using Repository
By adding the official repository of Android studio to your source list, you can install Android Studio on Ubuntu 20.04 using this technique. However, you have to ensure that some essential programs are loaded on the Ubuntu system first.
Installing Android Studio via the repository requires the steps listed below:
Step – 1: Download and install the JDK
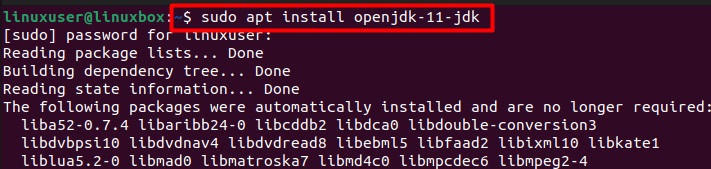
Installing the JDK tool is necessary in order to use Android Studio. Therefore, if JDK is not yet installed on the system, you will install it using the below command:
$ sudo apt install openjdk-11-jdk

During processing, you will be prompted to decide if you wish to proceed or not. To continue with the installation procedure, press “Y.”
Step – 2: Add the audio repository
After JDK is downloaded and installed, you must install the studio repository by executing the command given below.
$ sudo add-apt-repository ppa:maarten-fonville/android-studio
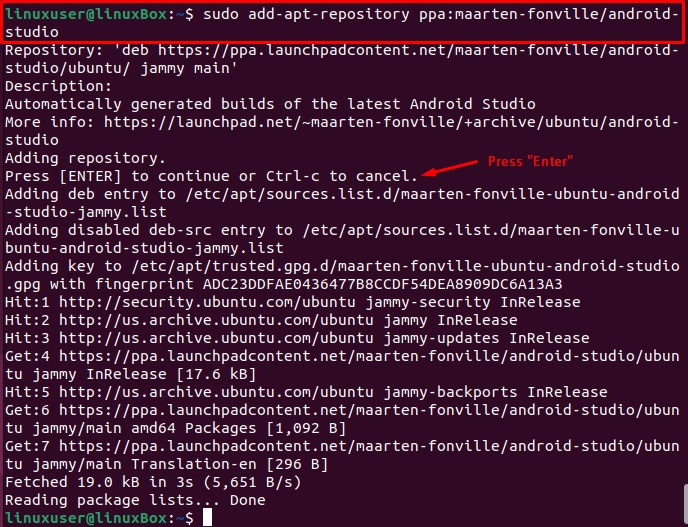
The pop-up will appear in the terminal during installation; hit Enter to carry on with adding the repository, or press C + Ctrl to stop adding the repository to the system.
Step – 3: Update the system cache
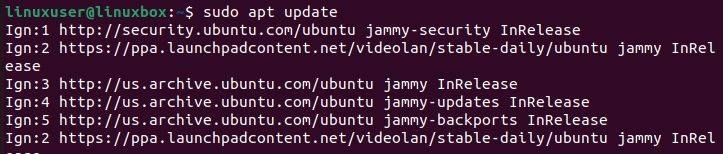
You should use the below command to update the system’s apt-cache after setting the Android repository successfully:
$ sudo apt update
Step – 4: Install the Android Studio on Ubuntu
It’s now time to use the package manager to download the Android Studio for Ubuntu. The subsequent command will help you install ADB Ubuntu and all of its requirements.
$ sudo apt install android-studio

Step – 5: Launch the Android studio app
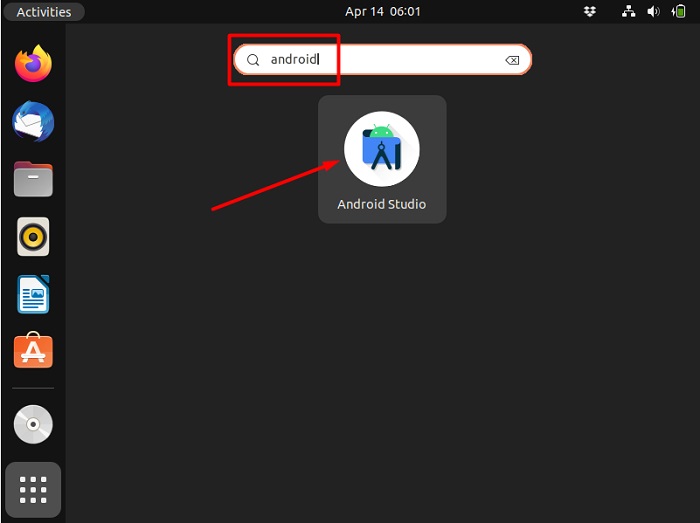
You’ll use the search section in the app launcher to open Android Studio when you’ve finished installing it.
For that, click Activities, which can be found on the Ubuntu system in the top corner of the desktop. Now enter the search term “Android Studio” into the box.
To operate the app, simply click it once you’ve located it.
Also know: 5 Effective Tools for Android App Development using Python
Way 2 – Install Android Studio Using the Snap
Here, we’ve gone into further detail about how to install Android Studio on Ubuntu using the Snap store. Follow the instructions below to install fastboot Unbuntu.
Step – 1: Install the snap
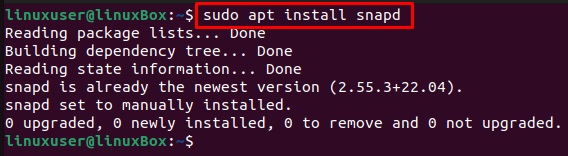
Ubuntu system already has Snap installed by default. Still, if your system doesn’t have it, install it using the command listed below.
sudo apt install snapd
Step – 2: Download and install the JDK
As mentioned in the previous technique, you must first install the JDK on the PC prior to setting up Android Studio. Use the below command to do so.
sudo apt install openjdk-11-jdk
Step – 3: Install the Android Studio on Ubuntu
On your Ubuntu system, run the below command to install the Android Studio utilizing snap:
$ sudo snap install android-studio –classic

So, there are two options to install Android Studio on Ubuntu: the snap repository or the Android-studio repository. Each approach has a specific set of actions that we have covered in great depth above.
Follow them systematically and install Android Studio on Ubuntu easily through all the aforementioned methods.
Now, further in this article, let us see the systematic procedures to install Android Studio on Linux.
Also read: Cross-Platform App Development Frameworks to Know in 2022
How to Install Android Studio on Linux
Android Studio is the official Google IDE – Integrated development environment, which was created especially for creating native Android apps. In terms of development simplicity, there is no better solution for Android apps than Android Studio.
It is a development tool, and it’s obvious that installing it on your desired development platform isn’t precisely a plug-and-play process. There are some manual steps necessary to set up the Android Studio for Linux Ubuntu. So, to install Android Studio on Linux, we have compiled some easy stepwise methods.
Without wasting a moment let us discuss them and install Android SDK on Linux successfully.
Steps to Install Android Studio on Linux
Follow all the below steps precisely to successfully install Android studio for Kali Linux. You may use these procedures to install Android Studio for Arch Linux as well.
Step – 1: Download Android Studio for Linux
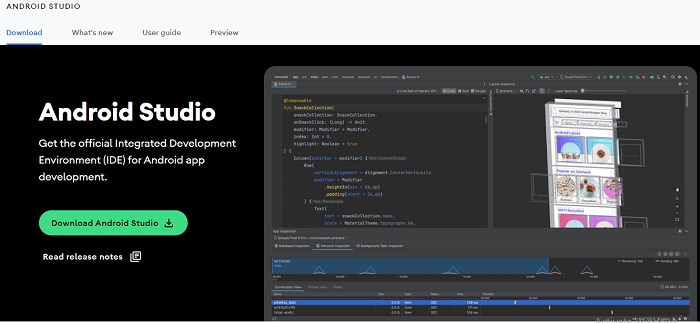
Since it is not available in the repositories, you must first download the most recent version of Android Studio from the official website.
Go to the official website and download Android studio for Linux.
Step – 2: Extract the files of Android studio installed on Linux
After you have finished the step to download Android studio for Linux, the next thing you can perform is make a directory in which it needs to be installed.
Now, open the file you downloaded. There ought to be an Android studio folder visible. When you will open that folder, you will find numerous folders and files inside it.
Extraction of the ZIP file’s contents to the desired location is required when the download is complete.
Also read: How to Dual Boot Windows 10 and Ubuntu
Step – 3: Install the JDK
The Java Development Kit (JDK) is a prerequisite for installing Android Studio, so be sure to install it on your system.
Run the below command to confirm if your system contains JDK or not.
java –version
If your JDK version doesn’t show up, it means you need to install it on your system. Run the below command to install the JDK if it isn’t already on your system.
$ sudo apt install openjdk-11-jdk
Step – 4: Check for the required libraries
In order for Android Studio to function, we must ensure that a few libraries are installed. These libraries must be located and installed using the proper package manager.
To successfully install Android SDK in Linux, you need to locate and run the appropriate and required libraries in the terminal.
Step – 5: Launch the Android Studio
After the extraction process is complete, navigate to the bin directory in the installation directory. There ought to be a file within with the name studio.sh.
Select the Open in Terminal choice from the context menu when you right-click on a blank area of the window.
Run the below command after the terminal window has opened.
$ ./studio.sh
Thus, Android Studio will launch. You are good to go to use the Android studio app!
So, following all the above steps you can easily install Android studio on Linux.
Also read: How to Install Android Studio on Windows PC
Conclusion
Installing Android Studio merely requires a few mouse clicks. Numerous Android application developers use it all around the world and there is a sizable community for it. Hence, in this article, we have compiled all the possible effective procedures to install Android Studio on Ubuntu and also the steps to install Android Studio on Linux.
Follow all the above methods systematically, if you have any queries feel free to let us know in the comment section below!
