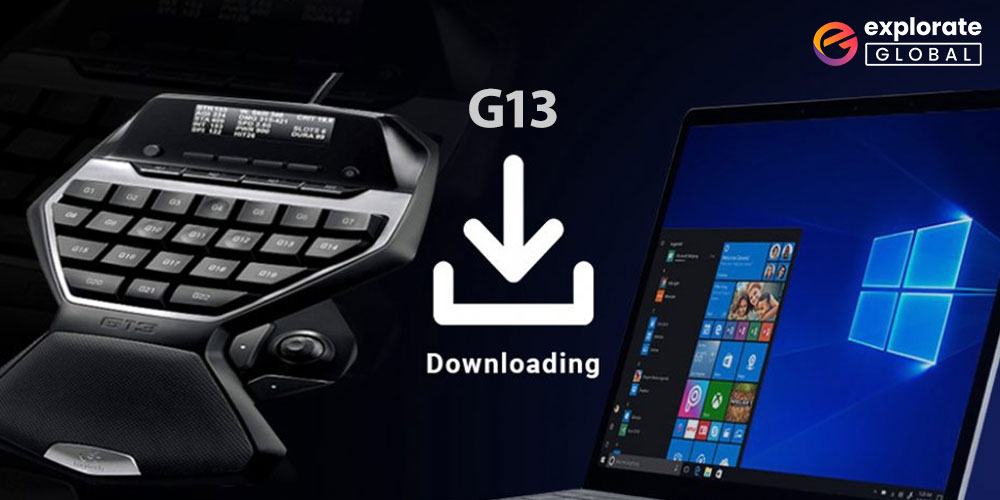
If you correctly download, install, and update the Logitech G13 driver, you can easily fix all the issues with your Logitech G13 Gameboard. To find out how to do it best, keep reading.
One of the brands that die-hard gamers adore is Logitech. It provides outstanding gaming accessories to elevate your experience. One of the company’s products is the Logitech G13, a customizable Gameboard that gamers worldwide have praised for elevating their gaming experience to a whole new level. Because of this, many gamers continue to use it even though Logitech stopped making it. An odd issue has arisen today: the Logitech G13 Gameboard is not working. Download the Logitech G13 driver to resolve this problem if you’re bothered by the same cause.
Now, there is a concern that simply restarting the Gameboard is insufficient and that the Logitech G13 driver must be downloaded and installed. Restarting G13, however, only occasionally resolves the issue. You need to download, install, and update the Logitech G13 driver to ensure the issue is fixed. This typewritten note tells you how to accomplish it.
Download Logitech G13 Driver and Install the Same
If you know the proper procedures to follow, downloading, installing, and updating the Logitech G13 driver is a piece of cake. We share them with you here.
Method 1: Go To the Official Website to Download the Logitech G13 Driver.
On the manufacturer’s website, you can find every driver. The method for finding and downloading the Logitech G13 driver from the official website is shown below.
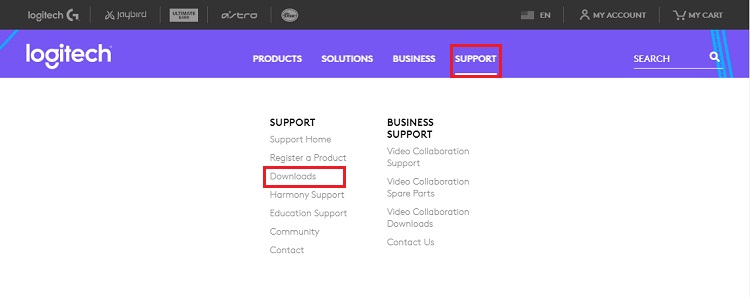
- Search your browser or click here to go to the website of Logitech.
- Choose “Support” from the four options present on your screen.
- From the options list that appears on the screen, pick “Downloads.”
- Upon entering the Support screen, type “G13 Gameboard” in the bar at the top and select it from the results list.
- Once you come to the screen showing you how to get started with the G13 Gameboard, pick “Downloads” from the options displayed in the left pane.
- Click on the blue-colored “Download Now” button.
- Finally, carefully follow each of the steps that Windows shows to install the G13 Gameboard drivers.
Method 2: Use Device Manager to Install G13 Gameboard Drivers
If you have the proper patience, you can use Device Manager to resolve any driver-related problem. To download, install, and update the Logitech G13 Gameboard driver, carefully adhere to the instructions offered here.
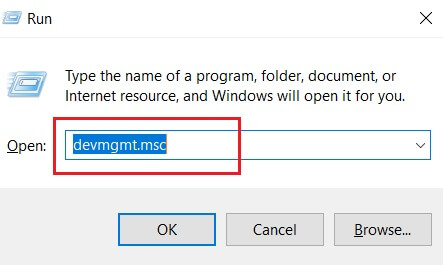
- Use the Windows + R command to kick off the “Run box.”
- In the bar present in the Run box, type the below-mentioned command, and click “OK.”
devmgmt.msc
- After the opening of Device Manager, expand the section titled “Sound, video, and game controllers.”
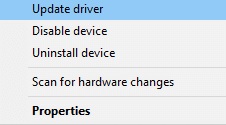
- Right-click the Logitech G13 Gameboard and choose “Update driver” from the small menu.
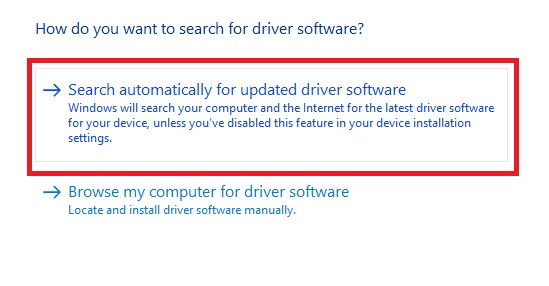
- Now, pick “Search automatically for updated driver software from the two on-screen alternatives.”
- Have patience until Windows installs the updated Logitech G13 Gameboard driver on your PC.
Also know: How to Fix Logitech G Hub Not Loading on Windows 10,11
Method 3: Install the Updated Windows Version
You can download, install, and update the Logitech G13 Gameboard driver if a Windows update is available. The detailed process to install the operating system upgrade is listed below.
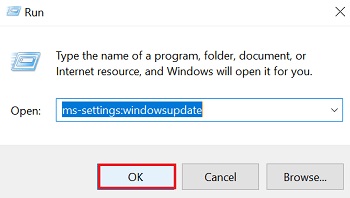
- Using the first step stated in method 2, open the Windows 10 “Run box.”
- Once the box manifests itself, type “ms-settings:windowsupdate” in the Open bar. After typing the command, click “OK.”
- After the Windows update settings manifest themselves, click on the button stating “Check for updates.”

- Now, the last step is to download the update that Windows finds and wait for its installation.
After learning the quick methods to download and install the Logitech G13 driver, now let’s update it in the best way.
The Most Appropriate Method to Update Logitech G13 Driver
If you follow the proper procedure, updating the Logitech G13 driver is just as simple as downloading and installing new drivers. Using Bit Driver Updater is, in our opinion, the most appropriate and practical way to obtain all drivers. This application barely requires manual input to download, install, and update the Logitech G13 driver. It automatically updates all device drivers, not just the Logitech ones. Additionally, it enhances PC performance simultaneously. After learning the simple steps you must follow to update drivers with this tool, we will cover its many other capabilities.
Here are some simple instructions for using Bit Driver Updater to download, install, and update drivers.
- Use the Button shared here to install this tool on your computer.

- After it launches, keep calm for a few seconds till the utility scans your device.
- When the scan is complete, choose the “Update Now” option next to the Logitech G13 driver. However, you can also update all the out-of-date drivers in unison by choosing “Update All.”

From the three steps mentioned above, we may conclude that downloading, installing, and updating drivers cannot be any easier. Let’s now discuss some of Bit Driver Updater’s laudable qualities that make it our absolute favorite.
Remarkable Features of Bit Driver Updater
- It performs the installation of WHQL-validated driver updates.
- Bit Driver Updater makes driver backup and restoration an easy process.
- There is a unique Ignore list option that allows you to exclude a particular driver from the scan.
- It gives the performance of your computer an instant boost.
- The utility is downloadable on all new Windows versions, i.e., Windows 7, 8, and 10.
- This utility is a multilanguage program.
Download Logitech G13 Driver: Completed Successfully
In order to fix numerous Gameboard issues, we highlighted in this post how to download, install, and update the Logitech G13 driver. In our opinion, Bit Driver Updater is the best method for obtaining all required drivers and resolving problems. Nevertheless, please don’t hesitate to contact us if you have any alternative viewpoints. Continue to follow our blogs for more of these technical guides.
