You won’t experience any problems printing with your Ricoh printer if you have the most recent and accurate driver. Therefore, read this text to discover how to download, install, reinstall, and update the Ricoh Printer Driver in a quick and simple manner.
Ricoh printers are known for producing prints of exceptional quality at competitive prices. To support it, every printer nevertheless requires a driver. Your instructions won’t be received by the computer properly without the proper driver, and you’ll have to deal with various printing problems. Printers made by Ricoh are also not an exception. To provide you with the finest printing experience, they also need drivers. This post will therefore walk you through the process for Ricoh Printer Driver Download.
This tutorial will also teach you how to reinstall and update the Ricoh Printer Driver if you currently have one but are still experiencing printing problems.
Let’s go right to the ways to download, install, reinstall, and update the drivers for Ricoh printers without further ado.
Methods to Ricoh Printer Driver Download, Install, Reinstall, and Update Them
For your convenience, we have divided this section into two parts. Let’s discuss the first part, which discusses how to download the driver for Ricoh printers, install, and reinstall it. After that, we will illustrate the ways to update it.
Part I: Download Driver for Ricoh printers, Install, and Reinstall it
You can follow the methods elucidated below to download, install, and reinstall the driver for your Ricoh printing machine.
Ricoh Printer Driver Download via the Ricoh Website
The manufacturer’s website is among the best places to get the required drivers, provided you know how to find the drivers compatible with the make and model of your computer. To download and install the Ricoh Printer Driver this way, you can go along with the below instructions.
- Click here to go to the official website of Ricoh.
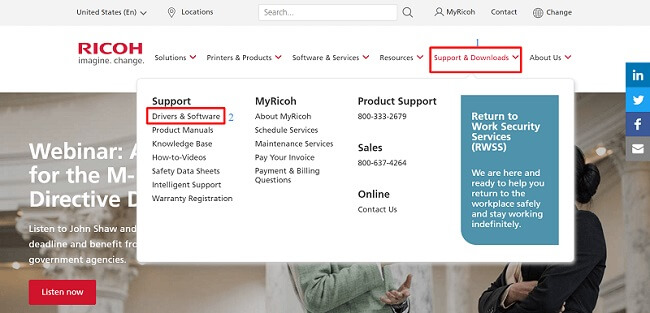
- Hover your mouse over the Support & Downloads tab and select Drivers & Software from the on-screen menu.
- Click on Select to find downloads for your equipment box and choose Printers and Copiers from the drop-down menu.
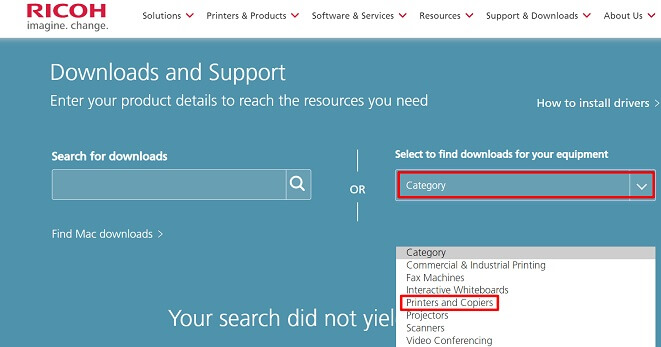
- Click on the Sub Category box and select Printers from the on-screen list.
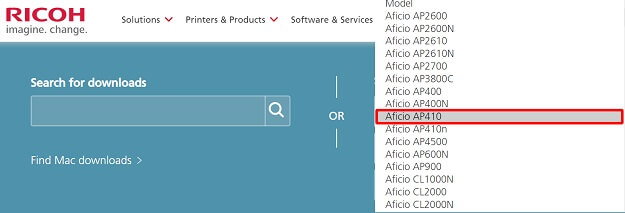
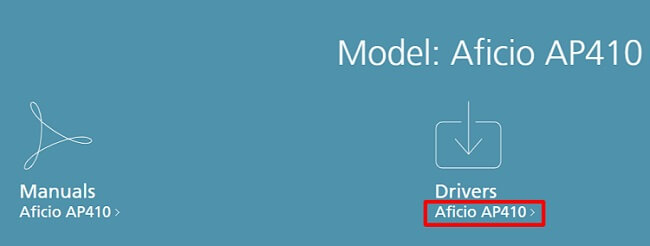
- Click on the Model box and choose your printer model. Here we are taking Aficio AP410 as an example.
- Click on the Drivers option to move to the next step.
- Click on I AGREE to accept the Software License Agreement.
- If the detected operating system is incorrect, then click on Choose other OS and choose your OS.
- Select driver language.
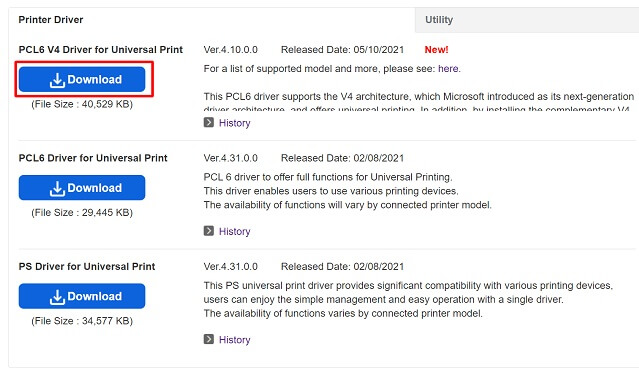
- Click on the Download button to download the required driver file.
- Click on the downloaded file and tread on the heels of on-screen directions to install the Ricoh printer’s driver.
Download and Install the Driver for Ricoh Printers via Device Manager
Another way to download the correct drivers for Ricoh printers for free is by doing it through Device Manager. If you are confused, Device Manager is a tool in Windows that allows you to perform various tasks such as downloading, installing, reinstalling, and updating drivers. Follow the below steps to download and install the driver you need.
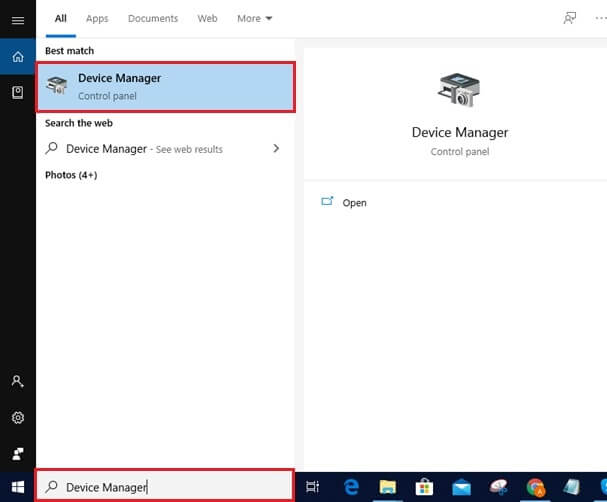
- Use the keyboard shortcut Windows+X to initiate the Quick Access menu.
- Choose Device Manager from the menu that comes up on your desktop.
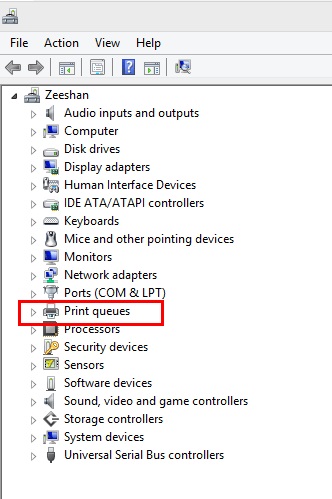
- After Device Manager is initiated, click on the category of Printers or Print queues.
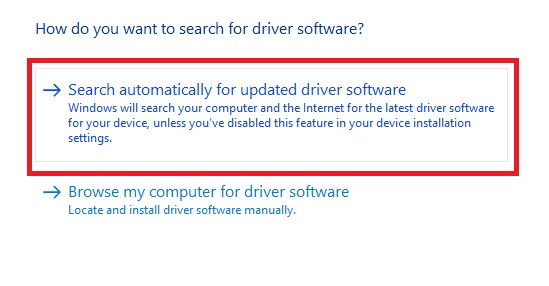
- Right-click on the Ricoh printer and select Update driver from the menu that you get.
- Select the option that allows Windows to Search automatically for updated driver software.
- Let Windows find a compatible and updated driver for your Ricoh printer, download, and install it.
- After the process is complete, reboot your PC.
Reinstall the Driver for Ricoh Printers with Device Manager
Along with downloading the driver and installing it, you can also use Device Manager to uninstall the Ricoh printer’s driver and install it again. Below are the steps to do it.
- Call up the Device Manager.
- Click on the segment of Printers or Print queues.
- Right-click on the Ricoh printer and select the Uninstall device option.
- Mark the Delete driver software for this device option and click on OK/Uninstall.
- Wait for the uninstallation process to complete.
- After the process completes, reboot the computer.
Also know: How to Fix Windows 10 Printer Driver is Unavailable
Part II: Update the Ricoh Printer Driver
You can follow either a manual approach or an automatic method to download the updated driver for Ricoh printers. We discuss both these ways below.
Download the Updated Driver for the Ricoh Printer Manually
It takes quite a lot of effort and energy to update the driver for the Ricoh printer manually. However, if you are willing to do it manually, you can follow the steps shared below.
- Using the shortcut command Windows+I initiate Settings.
- Select Update & Security.

- Click on the Check for updates tab.

- Wait for a few hours till Windows finds an update for your OS, downloads, and installs the same.
- After the whole process completes, restart your PC.
Update the Ricoh Universal Printer Driver Automatically
As you may also have felt, the manual methods to get the driver for Ricoh printers downloaded, installed, and updated are quite time-consuming. Therefore, to save your precious time and energy for more productive work, we recommend you download, install and update the driver automatically,
Using an automatic tool like Bit Driver Updater (one of the best driver updaters available currently), you can download updated versions of the drivers existing on your PC in just a few clicks. Moreover, this software also provides numerous features and benefits that you can know by reading its detailed review.
Below is how to download and install the updated version of the Ricoh Universal printer driver automatically.
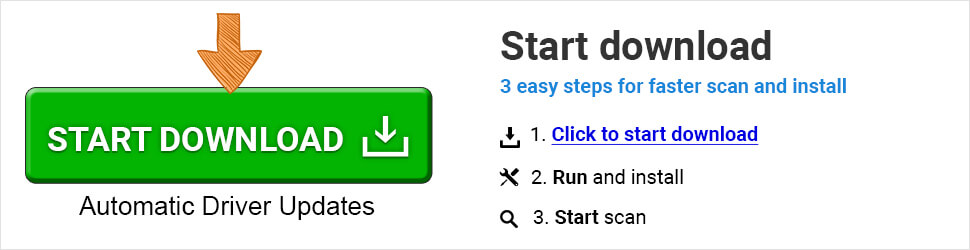
- Click on the below button to download the setup of Bit Driver Updater.

- Click on the downloaded setup and complete the software installation.
- Let the software scan your computer.
- Choose the Update Now button present alongside the Ricoh printer driver to get its updated version.

Along with the driver for the Ricoh printer, you can also use this software to update all the outdated drivers present on your computer and solve related problems with just a click. To do this, click on Update All.
Also know: How to Solve RPC Server is Unavailable error in Windows
Ricoh Driver Downloaded Successfully
This typewritten note cum tutorial taught us how to download, install, reinstall, and update the Ricoh Universal printer driver. We really hope that you found this material to be beneficial. Be sure to subscribe to and bookmark our blog for more expert tech instructions. We’ll be back with another post like this soon. You can brush up on your tech expertise in the interim by reading our other articles.