
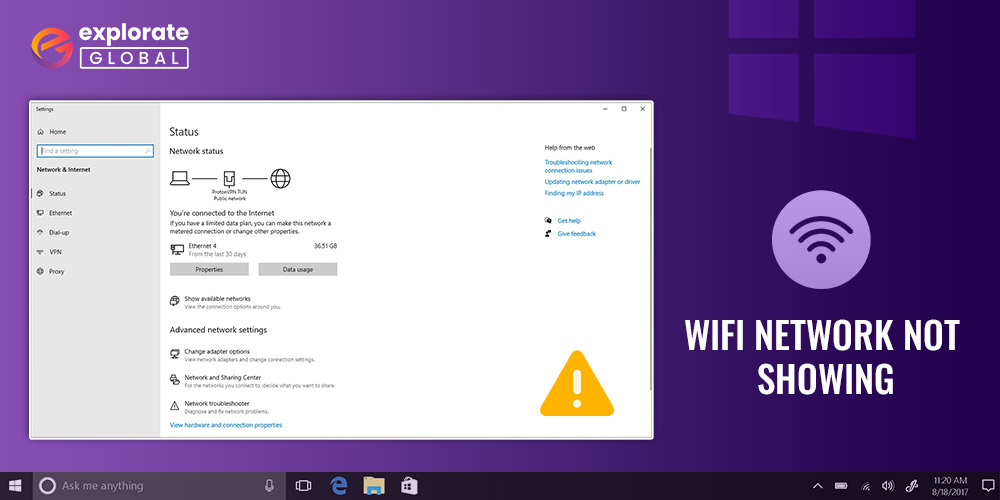
This post talks about the easy and quick fixes to resolve the issues if WiFi network is not showing up on Windows 10 so that you can connect to WiFi seamlessly.
A Windows update is what we do to fix the majority of PC issues. However, sometimes, instead of resolving the already existing problem, the update brings another set of issues with it. For instance, the users are facing a problem these days where the WiFi network is not showing up on Windows 10 after an update. Since you have landed on this article, we believe that it is not wrong to assume that you are also struggling to fix the same issue.
You need not worry as we have found the quickest fixes to solve this problem.
Fix the WiFi Network Not Showing Up on Windows 11, 10 Issue
Fixing the problems causing the WiFi network not showing up on Windows 11/10 issue requires an implementation of the below-mentioned solutions. Start from the first one and stop at the fix that solves the problem for you.
Fix 1: Turn the WLAN AutoConfig Service
In case you have not turned on the WLAN AutoConfig service, then Windows 10 cannot connect to WiFi. Thus, implement the steps shared here to turn on the WLAN AutoConfig service.
- Initiate the “Run box” using the Windows + R key command.
- After the box is triggered, input “services.msc” and click the “OK” option.

- Once the Services window opens, find and right-click on “WLAN AutoConfig” and choose “Properties.”
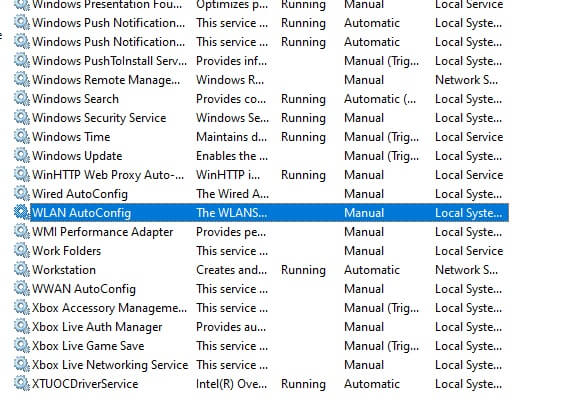
- Go to the Startup type option and select “Automatic” from the descending list.
- Click on the “Start” button located under the Service status.
- Select “OK” and then “Apply.
- Finally, restart your computer.
Fix 2: Start the Modem and WiFi Router Again
Now, this is among the simplest fixes that you can try to solve the Windows cannot connect to the WiFi problem. However, we do not guarantee that this solution will work for all the users. It may work for some, whereas it may not work for the others. Follow these instructions to restart the modem and WiFi router.
- Unplug both the modem as well as the WiFi router.
- Wait patiently for half a minute.
- Replug the modem and WiFi router.
- At last, try reconnecting the wireless network.
Fix 3 : Turn on the SSID Broadcast
SSID broadcast is responsible for making the network adapter recognize your WiFi network. Therefore, make sure the SSID broadcast is turned on. Below is the way to do that.
- Note the IP address, username, and the WiFi connection password from the wireless router.
- Launch the browser on your computer using the cellular network to connect to the internet.
- Type the IP address that you noted in the first step and press the “Enter” key.
- Enter the username and password that you earlier noted.
- Move to the “Wireless” option and select “Wireless settings.”
- Tickmark the box present before the “Enable SSID Broadcast” option.
- Click “Save” and then start your computer again.
- After the computer restarts, connect to the wireless network again.
Fix 4: Check the Interference of Other Household devices
Many times, household devices like microwave oven, phone, Bluetooth speaker, and more interfere with the wireless connection. Therefore, you must ensure that no device is interfering with your wireless connection. You can do it by following the instructions shared here.
- Turn the devices off and unplug them.
- Try connecting the WiFi and check whether the problem has been resolved or the WiFi network is still not showing up on Windows 10.
- If the problem is solved, then shift the modem and router to a place away from the interfering household devices.
Fix 5: Update Network Adapter Driver Automatically
In the outset of this article, we mentioned that an outdated or missing network adapter driver is one of the central reasons for which your wireless network connection is not connected. Not on the problem that we are discussing but out of date drivers lead to several problems like system crashes, frame drops, and Blue Screen of Death to name a few. Therefore, we always advise users to update the drivers on time. To make the task more convenient for you we suggest that you adopt an automatic method to perform a driver update.
You can update drivers automatically through the best driver updater in town, i.e., Bit Driver Updater. This tool scans your entire computer to detect drivers that need an update, downloads WHQL certified drivers, and makes the computer perform exceptionally well. Apart from this, it has a huge driver database as compared to its counterparts.
Let’s now discuss the method to use this software.
- Install Bit Driver Updater on your computer through the link given here.

- After installing it, wait for 2 minutes till the automatic driver scan is finished.
- Find the driver that you want to update in the list of results and click the “Update Now” option. You can also select “Update All” to update all drivers together in a flash of a second.
WiFi Network not Showing Up on Windows 11/10: Solved
This article helped us solve one of the major problems that users are facing currently, i.e., the WiFi network is not showing up on Windows 10. We hope that the problem has now vanished and you can seamlessly connect to the internet via the wireless network connection. For more such solutions, stay in touch with ExplorateGlobal Blog. And, you can also find us on Twitter, Facebook, and Linkedin to be in contact with us.