
![[FIXED] Display Driver nvlddmkm Stopped Responding and Has Successfully Recovered](https://www.explorateglobal.com/blog/wp-content/uploads/2023/05/FIXED-Display-Driver-nvlddmkm-Stopped-Responding-and-Has-Successfully-Recovered.jpg)
The Windows 10 error message “Display driver nvlddmkm stopped responding and has successfully recovered” is causing you any trouble? Then, keep reading to find out how to quickly and easily fix it.
Display issues that cause the screen to flicker are the most annoying thing to a computer user. Another error that causes the screen to irritably turn on and off is “Display driver nvlddmkm stopped responding and has successfully recovered.”
If you’re looking for a solution to the “Display driver nvlddmkm stopped responding and has successfully recovered” problem, this article is what you need to be reading.
Here, we are going to acquaint you with how we fixed the issue. Let’s skip the unnecessary discussion and get to the tried-and-tested solutions.
How to fix “Display driver nvlddmkm stopped responding and has successfully recovered” issue
You can use these tested fixes to get rid of the “Display driver nvlddmkm stopped responding and has successfully recovered” error in Windows 10.
Fix 1: Turn off the Link State Power Management
Link State Power Management forms part of PCI Express and allows you to use the Active State Power Management (ASPM) policy for idle links. It helps manage power efficiently. But, at the same time, it also causes errors like “Display driver nvlddmkm stopped responding and has successfully recovered.”
Therefore, we suggest you follow these steps to turn it off.
- Search for the Control Panel and open it.
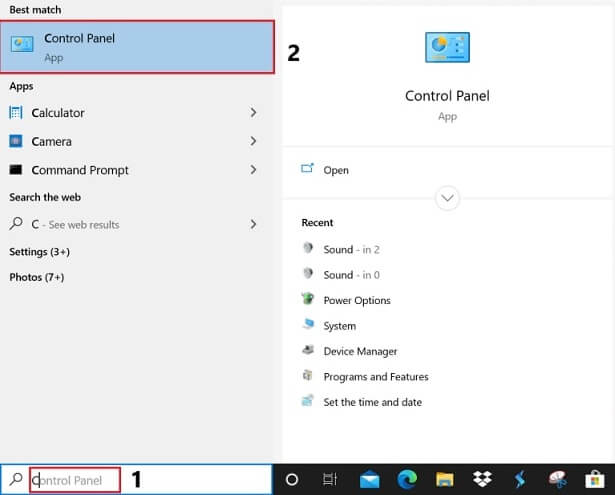
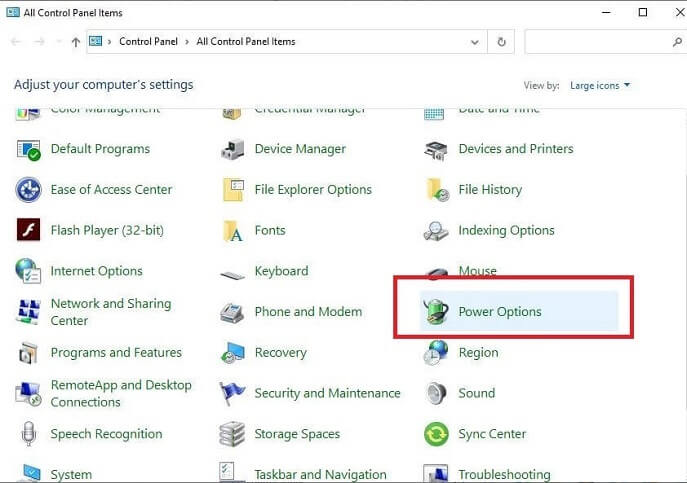
- Change the view to Small icons.
- Choose Power Options.
- Select the option to Change Plan Settings.
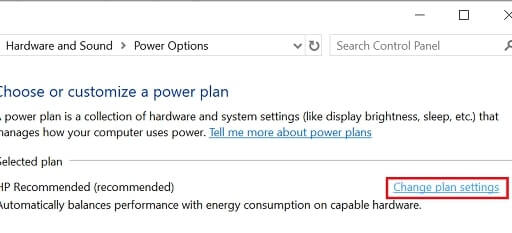
- Choose the option to Change Advanced Power Settings.

- Click on the PCI Express section to expand it.
- Disable Link State Power Management.
- Use the Apply and OK buttons to save the changes.

Fix 2: Update the display driver
Most of the screen or display issues exist because of outdated drivers. In all possible circumstances, an out-of-date display driver may be the reason for the error you are experiencing on Windows 10.
To fix the issue, it is crucial to update the driver for your display adapter. You can accomplish this task by using Device Manager/manufacturer’s website or automatic software.
We find it more convenient and safe to update drivers automatically with a smart tool, like Bit Driver Updater.
Bit Driver Updater gets the most recent, reliable, and certified driver updates on your computer with just a click. Further, it also offers many incredible features, such as a tool to create and restore driver backups, quicken the driver download process, etc.
You can download the software via the link below to experience it yourself. Or, if you wish, you can also read its entire review before downloading it.
Below is the easy step-by-step process to download driver updates and install them with Bit Driver Updater.
- After you download and install the program, give it a few seconds to complete the PC scan.
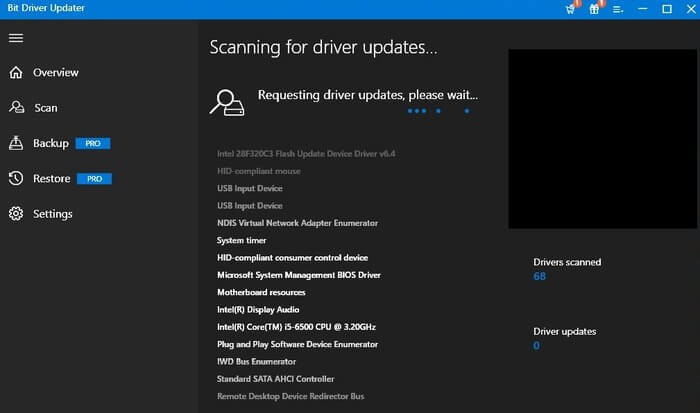
- Take a careful look at the scan results presented on your screen.
- Update All drivers to their freshly released version for better performance.
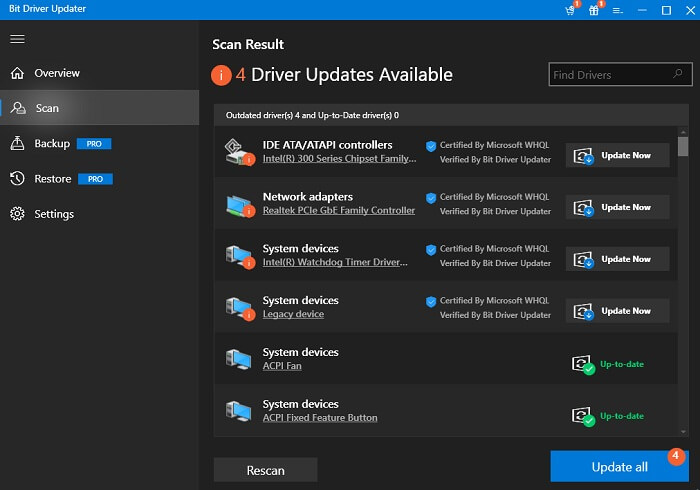
If updating only the display driver is what you want, use the Update Now button. However, to make the computer perform smoother than ever, you should perform updates for all drivers.
Fix 3: Check for Windows updates
Updating the operating system fixes many issues, including “Display driver nvlddmkm stopped responding and has successfully recovered” in Windows 10. Thus, below is how to check for and execute Windows updates.
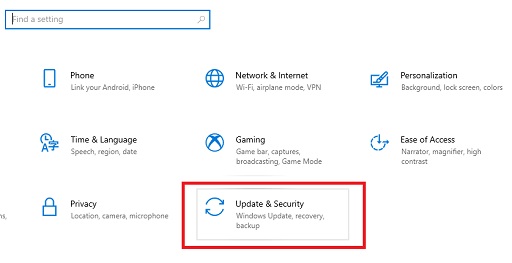
- Make use of the combination of keys Windows and I to open the Settings menu.
- From the available Settings panel, select Update & Security.
- Check for updates to your OS.

- Download and install the update available for your operating system.
- After the successful execution of all the above steps, restart your computer.
Also Read: Download, Reinstall & Update Display Drivers on Windows
Fix 4: Keep the graphics card temperature in check
Graphic card overheating also leads to the “Display driver nvlddmkm stopped responding and has successfully recovered” issue in Windows 10. Therefore, you must monitor the graphics card temperature and keep it under control. You can make use of the best software to prevent GPU overheating available in the marketplace to do it.
Fix 5: Change the theme
Animated themes look appealing. But they consume quite a bigger chunk of system resources. And, cause problems like the “Display driver nvlddmkm stopped responding and has successfully recovered” error in Windows 10.
Hence, you can change your computer’s theme by following these steps.
- Right-click on your desktop and choose Personalization from the context menu.

- Choose Themes from the left panel.
- Scroll down to the Change Theme section to view all the installed themes.
- Click on a theme to apply it.
Fix 6: Disable the Aura plugin (Only for ASUS motherboards)
ASUS motherboard users found that removing the Aura plugin fixes the issue. Thus, if you have an ASUS motherboard, you can also try this hack.
Fix 7: Change the graphics card
Remove the graphics card and insert another one in its place, if you have a spare graphics card available. If the problem does not rear its ugly head, your original graphics card was the main culprit. You need to replace it with a new one.
Fix 8: Rollback the driver for your graphics card
If you have tried updating your graphics driver manually, there is a high chance of installing a wrong update. To make things right and fix the “Display driver nvlddmkm stopped responding and has successfully recovered” error in Windows 10, you can roll back the driver update. Here is the correct way to do it.
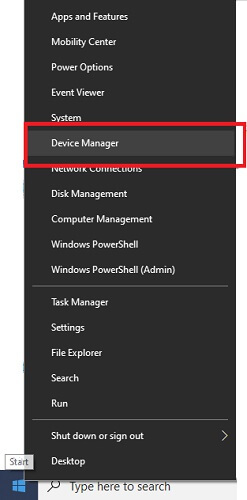
- Using the combination of Windows and X keys, get entry into the Quick Access menu.
- Select Device Manager from the options that you get on your screen.
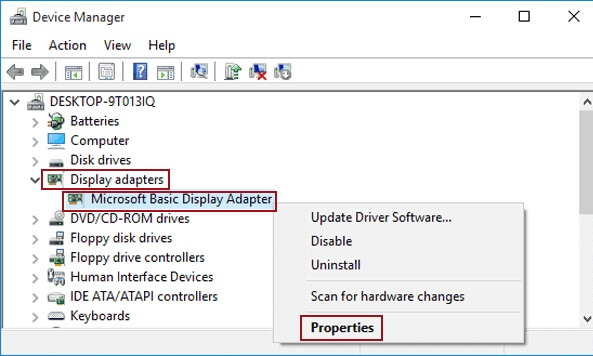
- Click on Display Adapters to get their expanded view.
- Right-click on the graphics card and select Properties from the options menu.
- Navigate to the Drivers tab and click on the button to Roll Back Driver.
- Pick a reason for rolling back the driver (you can select any of the given reasons).
- Choose OK to start the rollback process.
- Restart your computer after the process completes.
Also Read: How to Solve Display Driver Failed to Start Error on Windows
Fix 9: Get the graphics driver reinstalled.
If rolling back the driver has not worked for you to fix the error, you need to reinstall the driver. Here are the steps you can take to do it.
- Bring up the Device Manager (you can follow the path Windows+X>Device Manager).
- Click on the category of Display adapters to see its contents.
- Perform a right-click on the graphics card and pick Uninstall device from the list of options.

- Tick the Delete the driver software for this device box and select Uninstall/OK.
- After completing the uninstallation, return to the Device Manager, and choose Scan for hardware changes from the Action menu.

- After the scanning for hardware changes is complete, make sure to restart your computer.
Fix 10: Remove and change your computer’s RAM
Without RAM or Random Access Memory, the computer fails to work correctly. RAM stores all the necessary information for different programs to function properly. It helps in the quick extraction of data needed by the PC to perform various tasks.
If any issue occurs with the RAM, it leads to problems, like the “Display driver nvlddmkm stopped responding and has successfully recovered” error in Windows 10. To fix the problem, you need to replace the RAM.
If you are not an advanced computer user, we suggest you get professional help to change the RAM of your computer.
Fix 11: Make changes in the registry
Making a few changes in the registry by adding two keys can also help you fix “Display driver nvlddmkm stopped responding and has successfully recovered” in Windows 10.
However, before making any changes in the registry, kindly take a backup of your existing registry to avoid problems if anything goes wrong.
After creating a backup registry, you can follow these steps to add new registry keys.
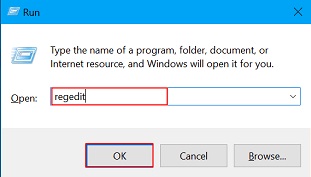
- Using the keyboard’s shortcut key Windows+R, make the Run utility visible.
- Input regedit in the box visible on your screen and click OK to launch the registry.
- Find and click on the folder
HKEY_LOCAL_MACHINE\SYSTEM\CurrentControlSet\Control\GraphicsDrivers.

- In the right pane’s Edit menu, make right-click on the blank space.
- Select New from the right-click menu.
- Choose a registry value from the pulldown menu according to your operating system. Our computer has a 32-bit OS. If you have a 64-bit OS, select QWORD (64-bit) Value.

- Enter TdrDelay as the Name Value.

- Make two clicks on TdrDelay, input 20 in the Value data field, and click the OK button.
- Repeat the above steps. But you need to name the DWORD key TdrDdiDelay.
- After making changes in the registry, restart your computer to save all the edits.
Also Read: Displaylink Driver Download, Install & Update on Windows
Fix 12: Configure MSI Afterburner
If you use MSI Afterburner and NVIDIA drivers simultaneously, there is a high chance of conflict between them. And, it causes issues such as “Display driver nvlddmkm stopped responding and has successfully recovered” in Windows 10.
To fix the problems, you need to uninstall the MSI Afterburner and then install the NVIDIA driver. Here is the way to do it.
- Use the Windows+X key to launch the Quick Access menu.
- Choose Apps and Features from the on-screen menu.

- Click on MSI Afterburner and then choose the Uninstall option. Along with the MSI Afterburner, uninstall RivaTuner Statistics Server as well.
- Now, get the updated NVIDIA driver and “Clean install” it.
- Launch the NVIDIA Control Panel and choose to Open Windows Sound Settings.
- Turn off all NVIDIA sound devices and exit the Control Panel.
If you wish, you can now reinstall the MSI Afterburner. But make sure to uninstall it every time you install updated NVIDIA drivers.
Fix 13: Check for malware infections.
Viruses and other malware-infected computers also behave erratically. Such infections also lead to annoying issues like the one you are experiencing.
Thus, you need to get safe and robust antivirus software to protect your computer and avoid such errors.
Above were all the possible ways to fix the “Display driver nvlddmkm stopped responding and has successfully recovered” error in Windows 10. Now, let’s answer a few questions related to it.
Solved: “Display driver nvlddmkm stopped responding and has successfully recovered” Problem
Through this article, we learned how to fix the “Display driver nvlddmkm stopped responding and has successfully recovered” error in Windows 10. You can apply the above fixes to get rid of it.
If you don’t want to try all the remedies, you can simply update the drivers using Bit Driver Updater to resolve the problem.
If you know of any additional, better solutions, please let us and the rest of our readers know in the comments section.
Please keep reading our blog for more solutions to frustrating tech problems.