

The issues in which Asus laptop WiFi is not working can be easily fixed. Continue reading to see how to address this issue quickly.
There are no online games, streaming movies, online learning opportunities, work-from-anywhere capabilities, or video chats with loved ones. We assume you’re wondering what all of this is. This is life as it is now, despite the internet. It is reminiscent of the way of life we once led. But can you even begin to picture life like that now? No, in our opinion. Not even we can. However, some Asus users are compelled to go without internet access because WiFi on Asus laptops does not function.
Mobile networks can provide internet connectivity, but doing so is expensive. If you’re in a similar position, pay close attention to this post because it provides simple solutions to resolve it.
We won’t occupy a lot of your precious time and will get right to the point. The remedies to the WiFi issue with Asus laptops are explained in the section below.
Best Solutions for Asus Laptop Wifi Not Working
Try out the below fixes to solve the Asus laptop WiFi not working issue in a New York minute.
Solution 1: Make Sure the Wifi is Not Disabled
The Asus laptop WiFi will not be working if it is disabled. Therefore, make sure the WiFi is enabled with the below steps.
- In the “Type here to search” bar, input “Network connections” and click the first result.

- Right-click the WiFi connection and select “Enable” from the options.
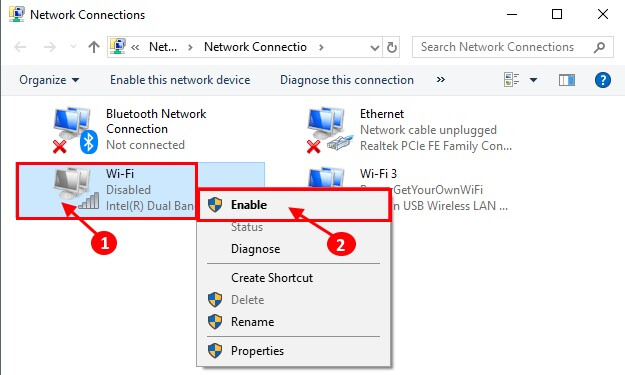
- Check whether your Asus laptop WiFi is working or not.
Also know: ASUS Motherboard Drivers Download and Update on Windows PC
Solution 2: Change the Address of the DNS Server
If you have set the address of the DNS server wrongly, then the Asus laptop won’t connect to WiFi on Windows 10. Thus, implement the below process to change the DNS server address.
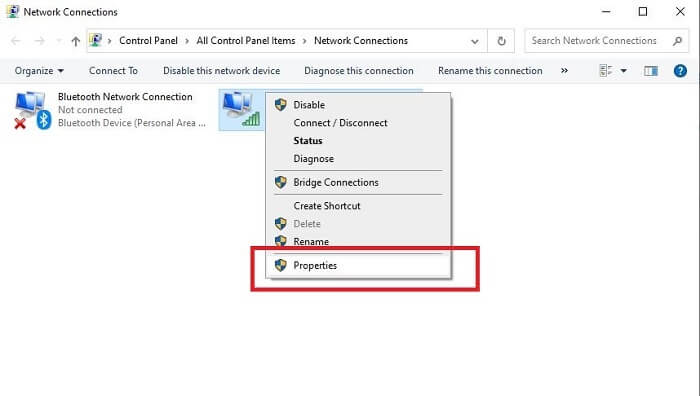
- Open “Network connections” on your computer.
- Right-click on WiFi and choose “Properties” from the options present in the popup menu.
- Select Internet Protocol Version 4 (TCP/IPv4) and choose “Properties.”
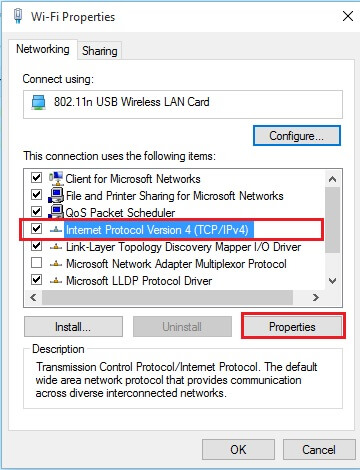
- Go to the “General” tab and enter the following in the DNS address.
For the Preferred DNS server, input 8.8.8.8
For the Alternate DNS server, input 8.8.4.4. - At last, click “OK” to save the changes that you have made.
Solution 3: Update the Wifi Adapter Driver
In almost all cases, WiFi does not work because of a broken or out-of-the-date WiFi driver. Further, outdated drivers are also one of the major reasons for a multitude of computer problems. Therefore, we suggest you update the drivers as soon as possible and ensure that they always remain updated. You can do so in two ways, one is manual, and another is a shorter automatic route. We recommend the second option as it makes updating drivers an effortless task. Bit Driver Updater is the topmost utility that we suggest to update drivers. It updates drivers automatically and requires almost no effort from your side. Below is the way of using it.
- Use the Button mentioned below to get this program.

- Install it and wait for a few seconds till the device scan is complete.
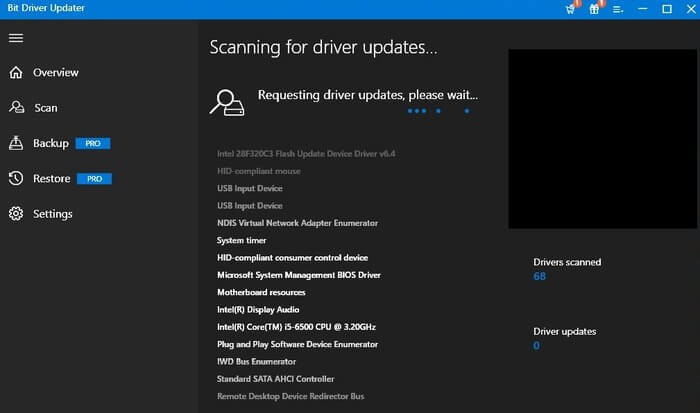
- At last, locate the WiFi driver from the result and click the “Update Now” option present next to it. If you wish, then you can also choose “Update All” to update all drivers in one click.

This was how to update drivers in the easiest possible way and improve the performance of the device at the same time. Below is the link from which you can download Bit Driver Updater.
Solution 4: Run the WLAN AutoConfig Service
If the WLAN AutoConfig Service is not running, then the Asus laptop cannot connect to WiFi. Therefore, go along with the below step-by-step instructions to run the service.
- Using the keyboard shortcut Windows+ R, make the “Run box” visible.
- Once the Run box gets triggered, type “services.msc” and click “OK.”

- Open Services Program From Run Command
- Wait for the Services screen to come up. After it gets visible, locate and double-click on WLAN AutoConfig.
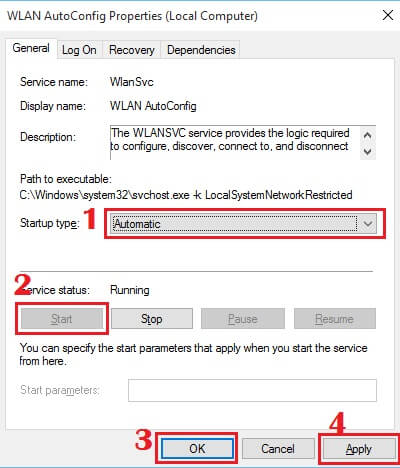
- After the WLAN AutoConfig Properties appear, click on “Startup type” and choose “Automatic.”
- Select “Start.”
- Click on “OK” and “Apply.”
Also know: ASUS Monitor Drivers Download & Update Guide For Windows PC
Solution 5: Reset the Settings of Your Network
You can reset the network settings to fix the Asus laptop WiFi if it is not working. Here are the quick steps to reset the settings.
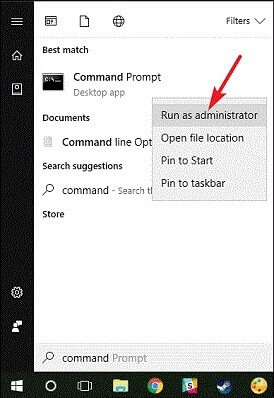
- Type “Cmd” in the Windows search bar and right-click the first result.
- Select “Run as administrator” from the right-click popup menu.
- Input the commands and press Enter after typing each of these commands.
netsh winsock reset
netsh int IP reset
ipconfig /release
ipconfig /renew
ipconfig /flushdns
- Restart your computer after running all the above commands.
Solution 6: Adjust the Settings of Power Management
Turning off the Wireless LAN card to save power can cause the Asus laptop WiFi not working problem on Windows 10. Therefore, follow these steps to fix the issue.
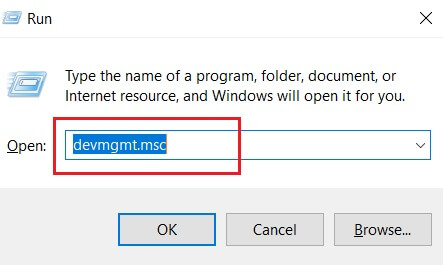
- Bring to sight the “Run box.”
- In that box, type “devmgmt.msc” and choose “OK.”
- When the Device Manager opens, click on “Network adapters” to the section to expand it.
- Right-click on Wireless LAN Card and choose “Properties” from the on-screen options.
- Go to the “Power Management” tab and unmark “Allow the computer to turn off this device to save power.”
Solved: Asus Laptop Wifi Not Working
We learned how to fix the Asus laptop WiFi through this blog post if it is not functioning. Hopefully, the issue has been resolved at this point. If you run across any problems while fixing it, feel free to ask any questions. Additionally, make sure you’ve subscribed to our blog because our next tech instruction will be available soon. In addition to the blog, you may follow us on Facebook, Twitter, YouTube, Linkedin, and other social media platforms.