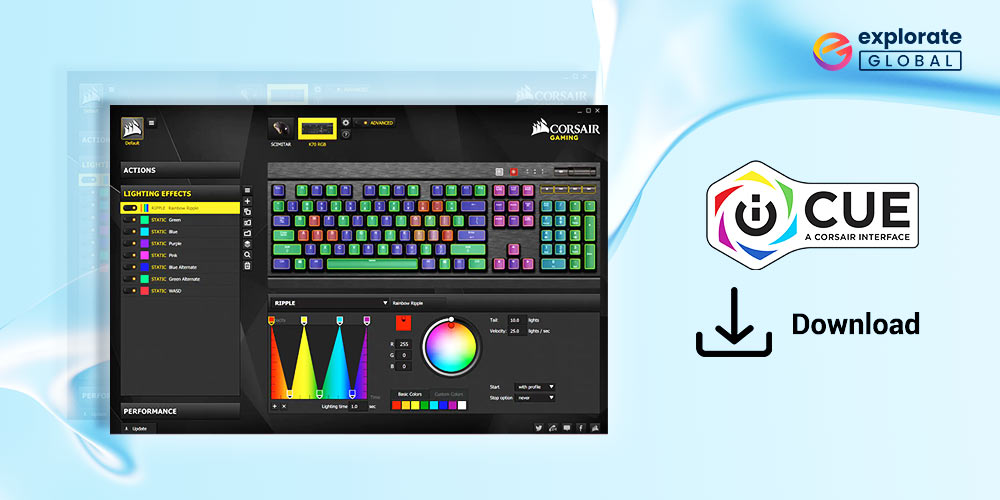
To connect to and manage all the Corsair devices and components on your PC, download Corsair iCUE. This guide will assist you in doing that. Read on to learn how to install, uninstall, and reinstall Corsair iCUE.
Without a doubt, Corsair is one of the largest manufacturers of gaming and high-end computer accessories. Corsair hardware and accessories are typically preferred by gamers for their computers. However, managing and controlling multiple high-performance peripherals on your computer can be very challenging. As a result, Corsair provides Corsair iCUE, software that unifies and manages all compatible devices and components. However, some of you might experience issues with the program’s download and installation. For that reason, we have created this guide to help Corsair iCUE download on your Windows 10 computer.
However, let’s learn more about the software first before moving on to the instructions to download, update, install, and reinstall Corsair iCUE.
What is Corsair iCUE?
As we have stated, iCUE is software that helps you unite and manage all the compatible Corsair components and peripherals on your PC. The iCUE is an abbreviation for Intelligent Corsair Utility Engine. It provides you with a command over the entire setup of your Corsair peripherals through a single interface. Hence, you can efficiently and effortlessly personalize the performance of your system along with the visuals as well.
You can synchronize & control the advanced RGB lighting effects of your Corsair devices, monitor their performance, and even manage the speed of your CPU fan using this program. The interface even allows you to command the smallest details of your compatible peripherals. Hence, if you want a more personalized experience with your Corsair components and devices, then you must download Corsair iCUE. Want to know how? Then let’s proceed with the below guide.
Easy Methods to Download Corsair iCUE
There are several ways that can help you with the Corsair iCUE download process and manage your Corsair equipment. Below, we have discussed the prominent ones. We have also explained some of the hacks that can help you install, reinstall, operate, and update the iCUE interface.
Method 1: Download, Install, & Update Corsair iCUE From the Corsair Website
Here comes one of the most genuine and common ways of downloading, installing, & updating Corsair iCUE. You can download the software from the manufacturer’s official website, i.e., Corsair’s website. Below are the instructions that you can follow for the Corsair iCUE download from the Corsair website.
- Visit the Corsair website homepage.
- Move your cursor to the SOFTWARE tab and select it.

- After that, click on the iCUE Software.

- Now, select the yellow “Download Now” button.

- Fill in the required details and then click the Submit button, or you can also skip this step by selecting the ‘Or skip this step and start Download’ option.

- After downloading the setup file, install the Corsair iCUE software by starting or running the setup.
- Follow the instructions required for the setup.
- After successful installation, run the Corsair iCUE and control the compatible components and peripherals of your PC using it.
Also read: Best Free Software Updater Programs for Windows 10/11
Method 2: Download & Reinstall Corsair iCUE
If you have recently downloaded and installed the Corsair iCUE application and it is not working properly, then you may not have installed it correctly. Hence, in that scenario, we suggest you reinstall Corsair iCUE on your PC. For that, you have to first uninstall the already installed app. Here is how you can do it.
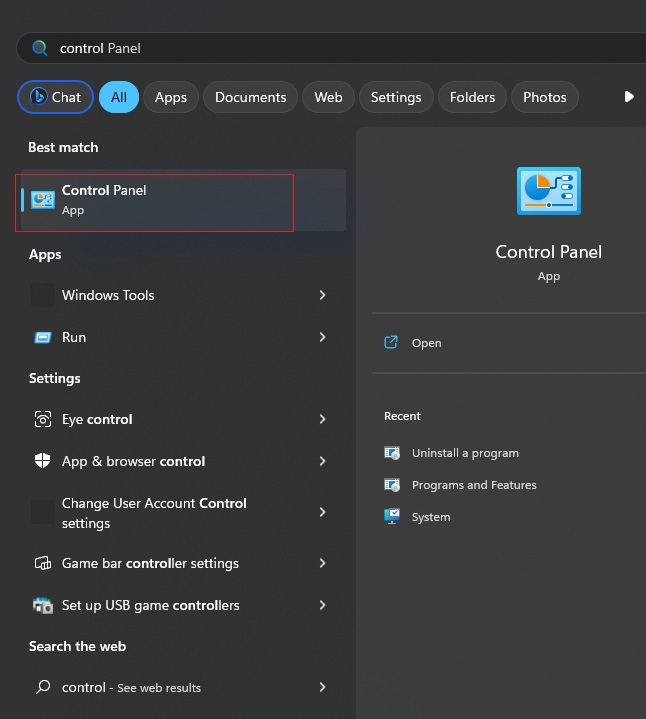
- Make use of your Windows search tool and search the Control Panel.
- Open it from the results.
- In the Control Panel, choose Programs and Features. However, before that, make sure you have selected to view the options of the Control Panel by large icons.
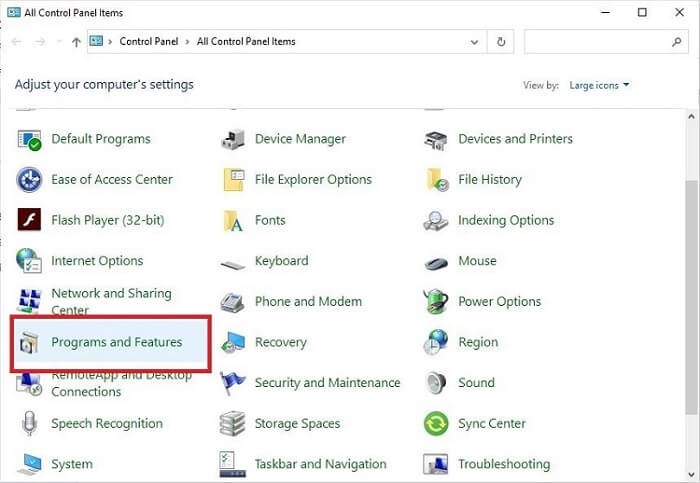
- In the Programs and Features panel, scroll down to the Corsair iCUE software and right-click on it.
- Uninstall it by clicking on the Uninstall option.
After uninstalling the software, you have to clear all the files related to it so that you can perform a clean Corsair iCUE download and reinstallation process.
Below are the steps through which you can remove all the iCUE app files.
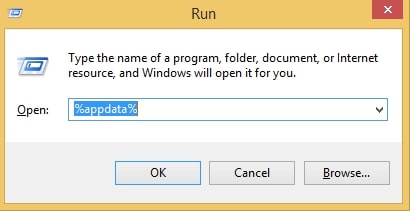
- Open the Windows Run Command by pressing the Windows Key and R simultaneously on your keyboard.
- In the Run dialog box, type %appdata% and hit the enter key on the keyboard or click the OK button.
- Select the Corsair folder and delete it permanently.
- After this, open the Run dialog box again and type %localappdata% & hit the enter key or click the OK button.

- Once again, select the Corsair folder and delete it permanently.
- Now, go to the following location on your computer. C:\Program Files (x86)\
- Find and delete the Corsair folder permanently from the location.
- After that, open the Windows Registry Editor. You can do it with your Windows Search tool.
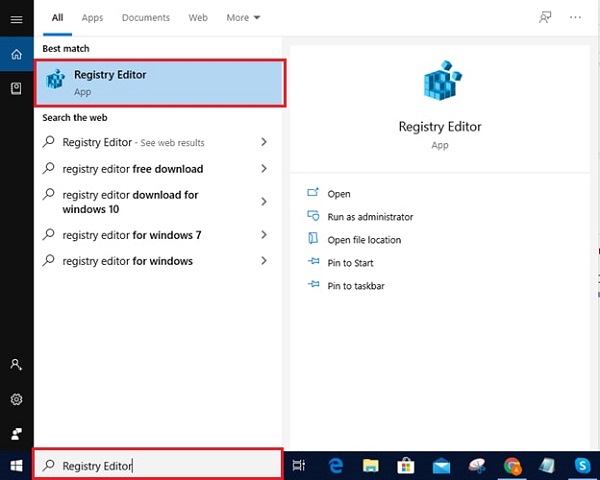
- In the Registry Editor, follow the following path. HKEY_CURRENT_USER\Software\
- Find the Corsair folder in the right-side drop-down menu.

- Delete it by right-clicking on it and then selecting the Delete option.

- Then, go to the below path in the Registry Editor. HKEY_LOCAL_MACHINE\SOFTWARE\
- Find the Corsair folder in the right-side drop-down menu.

- Delete it by right-clicking on it and then selecting the Delete option.

- Now, reboot the system by closing all the open Windows.
- Then, follow the steps provided in the first method to download Corsair iCUE.
- Reinstall the software properly by following all the instructions of the installation wizard appropriately.
Solution to Fix Corsair iCUE Issues
If you are having trouble while opening the Corsair iCUe app after downloading and installing it on your system, then here are the fixes that you must try.
Solution 1: Change the Corsair Folder Location
It may sound like quite a basic and inefficient fix, but it has worked for many people. You just have to change the location of the Corsair folder. Below are the steps that you have to follow.
- Go to the following location on your computer. C:\Program Files (x86)\
- Copy the Corsair folder.
- Now go to the below-mentioned location. C:\Program Files (x86)\

- Paste the Corsair folder and try to open the Corsair iCUE app.
After following the above steps, try to open the app. You can also try to uninstall the Steam and Malwarebytes software. After the Corsair iCUE download, reinstall them on your PC. The two programs conflict with the iCUE interface. Hence, you can try uninstalling them to open and use the Corsair application smoothly.
Solution 2: Update PC Drivers
Outdated drivers on Windows PCs cause a lot of problems with their functionality. No matter how advanced your system and its peripherals are, if you do not have the updated drivers, be ready to face troubles. Hence, it is essential to keep the driver software updated.
Even if you have followed all the steps to download the Corsair iCUE software appropriately, you may still experience problems opening and using it due to outdated drivers. But do not worry; you can resolve all of them by updating the system drivers.
Also read: Best Driver Updater Software for Windows & Mac (Free/Paid)
Final Takeaway On Ways To Download Corsair iCUE Program
So that’s everything to know about the Corsair iCUE download and fixing program opening problems. We hope the aforementioned instructions helped you install the program on your Windows computer. It is crucial to understand how to properly install, reinstall, and update the Corsair iCUE in addition to downloading the interface. And if, after doing everything correctly, you still encounter any issues when opening or using the tool, the aforementioned fixes can assist you in resolving them.
It’s advised to keep your PC drivers updated even if there are no issues with the Corsair iCUE. You can prevent a lot of system problems by doing this. And in our opinion, the Bit Driver Updater is the best tool for doing so. So, download it to update Windows drivers, which will enhance overall system performance.

