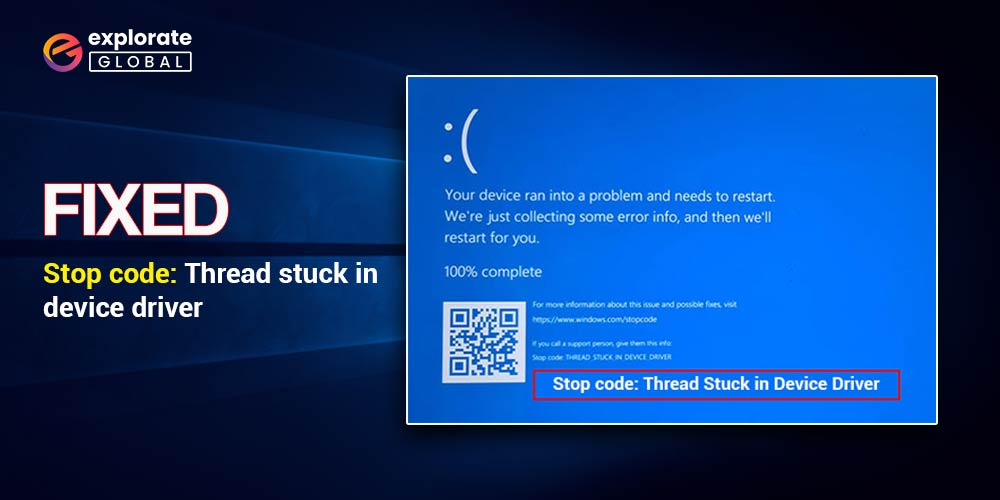
Are you tired of encountering the infuriating “Thread Stuck in Device Driver” error code on your computer? Well, fret no more! In this article, we will dive into the depths of this issue, exploring the causes and, most importantly, the fixes to resolve it once and for all.
Imagine this: you’re in the middle of an important task on your computer, a thrilling movie, or perhaps an intense gaming session when suddenly, your screen freezes, displaying the dreaded “Thread Stuck in Device Driver” error code. Feelings of frustration and annoyance instantly flood your mind, leaving you desperately searching for a solution.
Well, you’ve come to the right place. This error code, typically accompanied by a blue screen of death, is a common and troublesome issue that plagues many users. It is often related to outdated or faulty device drivers. These drivers are essential software components that allow your computer to communicate with various hardware devices, including your graphics card or onboard GPU. But fear not! We have gathered an array of efficient and proven fixes to help you overcome this error and bring your computer back to its optimal performance. Let’s dive in.
How to Fix Thread Stuck in Device Driver Error Code
In this article, we will explore some effective solutions to troubleshoot the “Thread Stuck in Device Driver” error and provide step-by-step instructions on implementing these fixes.
1. Update or reinstall the display driver:
A faulty or outdated display driver can trigger the “THREAD_STUCK_IN_DEVICE_DRIVER” error. To update your display driver, follow these steps:
- Press Win + X and select “Device Manager.”
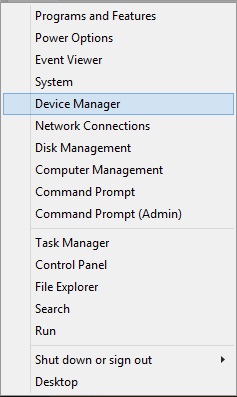
- Expand the “Display adapters” category.

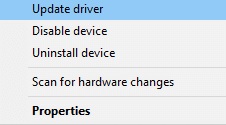
- Right-click on your display adapter and select “Update driver.”
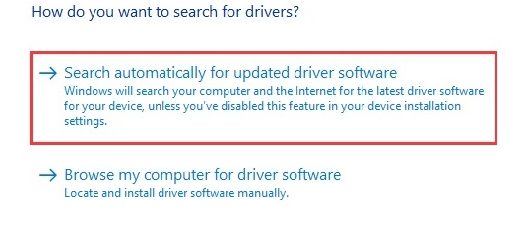
- Choose the option to automatically search for updated driver software.
- Restart your computer and check if the error persists.
You can also update the display driver using the Win Riser Driver Updater software. Follow the steps below to proceed:
- Download and install Win Riser Driver Updater by clicking the link below.

- After the installation is complete, launch Win Riser Driver Updater by finding its shortcut on the desktop or searching for it in the Start menu.
- After launching the program, it will automatically scan your system for outdated or missing drivers, including the display driver.
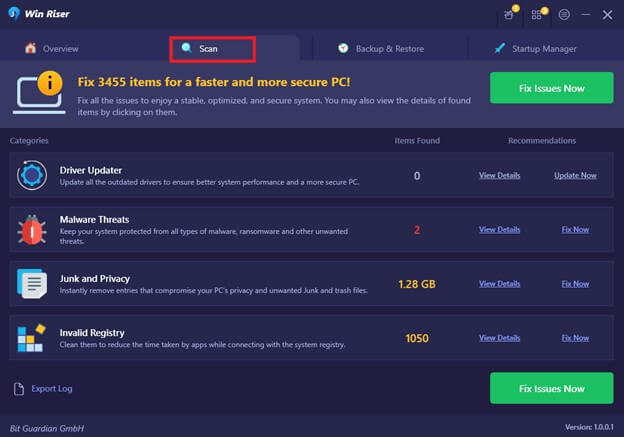
- Once the scan is complete, you will be presented with a list of available driver updates. Locate the display driver from the list and click on the “Update” or “Download” button next to it.
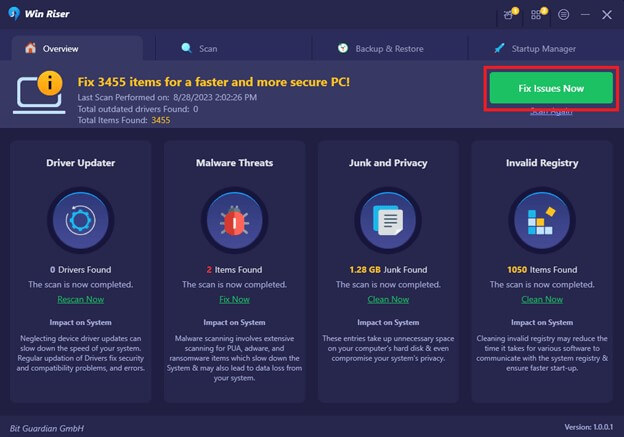
- Wait for the download and installation process to complete. This may take some time, depending on the size of the driver file and your internet connection speed.
- Once the display driver is successfully updated, you may be prompted to restart your computer for the changes to take effect. If prompted, save your work and click on the “Restart” button.
- After the restart, the latest version of the display driver should be installed and functioning on your system.
If updating the driver doesn’t resolve the issue, you may need to reinstall it. Follow the steps below:
- Open Device Manager and expand the “Display adapters” category.

- Right-click on your display adapter and select “Uninstall device.”
- Follow the on-screen instructions to complete the uninstallation.
- Restart your computer.
- Windows should automatically reinstall the driver. If not, go to the manufacturer’s website and download the latest driver for your display adapter.
2. Roll back the display driver:
In some cases, a recently installed driver update might cause the error. Rolling back the driver to a previous version can potentially resolve the issue. Here’s how:
- Open Device Manager and expand the “Display adapters” category.

- Right-click on your display adapter and select “Properties.”
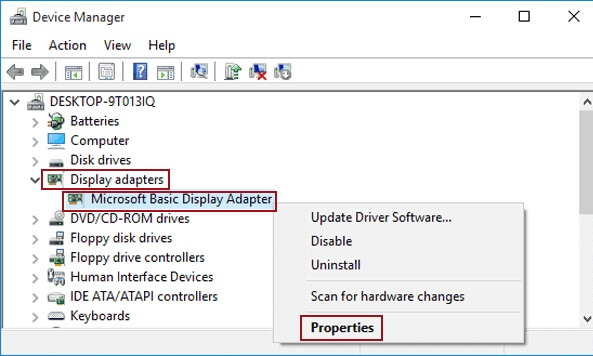
- Navigate to the “Driver” tab and click on “Roll Back Driver.”

- Follow the instructions to complete the rollback process.
- Restart your computer and check if the error still occurs.
3. Enable or disable the graphics card:
Toggling the graphics card can help fix the error code. To enable or disable the graphics card, follow these steps:
- Press Win + X and select “Device Manager.”

- Expand the “Display adapters” category.

- Right-click on your display adapter and select “Disable device.”
- Wait for a few seconds and right-click on it again, this time choosing “Enable device.”
- Restart your computer and check if the error has been resolved.
4. Run the Windows Hardware and Device Troubleshooter:
Windows provides built-in troubleshooters to automatically fix common issues. Running the Hardware and Device Troubleshooter can help resolve problems related to device and driver compatibility. Here’s how you can use it:
- Press Win + I to open the Settings app.
- Go to “Update & Security” and navigate to the “Troubleshoot” tab.
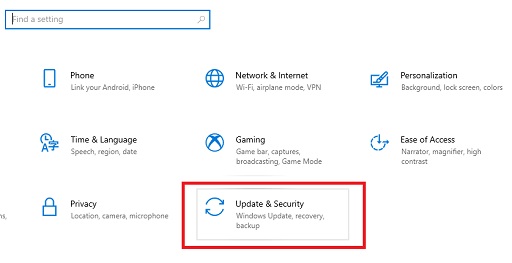
- Scroll down and click on “Hardware and Devices.”
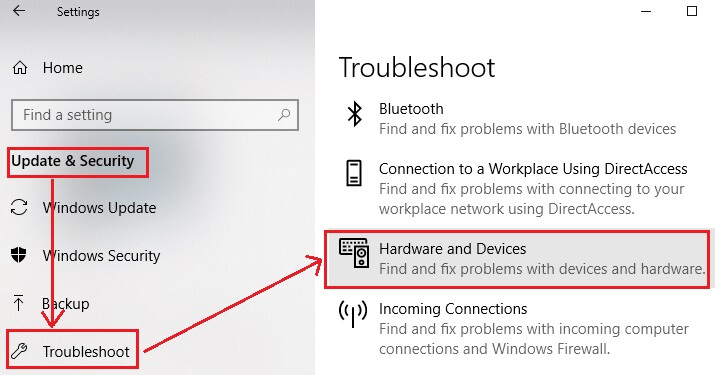
- Click on “Run the troubleshooter” and follow the on-screen instructions.
- Restart your computer once the troubleshooter completes its process.
5. Perform a clean boot:
Sometimes, third-party programs or services conflict with the display driver, causing the error. Performing a clean boot can help identify and disable any such conflicting programs. Here’s how to do it:
- Press Win + R and type “msconfig” in the Run dialog box.

- In the System Configuration window, go to the “Services” tab.
- Check the box that says “Hide all Microsoft services.”
- Click on “Disable all” to disable the remaining services.
- Go to the “Startup” tab and click on “Open Task Manager.”
- Disable all the startup programs by selecting each one and clicking “Disable.”
- Close the Task Manager and click on “OK” in the System Configuration window.
- Restart your computer and see if the error persists.
6. Adjust Power Management Settings:
Power management settings can sometimes interfere with graphics card operations, leading to the error. To adjust these settings, follow these steps:
- Right-click on the desktop and select “Graphics Properties” (or a similar option, depending on your graphics card brand).
- Look for a “Power” or “Power Management” section. Disable any power-saving options or set them to the maximum performance mode.
7. Check for Overheating:
Poor ventilation or dust accumulation can cause your graphics card to overheat, resulting in an error. Ensure that your system is adequately cooled and clean any dust from your computer’s fans and vents.
8. Perform a System Restore:
If the error started occurring recently, utilizing Windows’ System Restore feature can revert your system to a previous state when the error was not present:
- Press Win + R, type “rstrui,” and hit Enter to open the System Restore wizard.

- Follow the on-screen instructions to select a restore point before the error starts occurring. Be aware that this process will undo any system changes made after the selected restore point.
Also know: RS232 to USB Driver Download for Windows 11, 10
Error Code Thread Stuck in Device Driver: Solved
The error code “THREAD_STUCK_IN_DEVICE_DRIVER” can be a frustrating and disruptive issue for any computer user. It is indicative of a problem within the device driver, resulting in a halt to the system’s operations. However, with the right knowledge and troubleshooting steps, this error can be resolved efficiently.
By staying informed, staying proactive, and leveraging the resources available to us, we can overcome such obstacles and ensure our systems run smoothly and reliably. So, let us face the challenge head-on, armed with knowledge and determination, and rid our devices of the “THREAD_STUCK_IN_DEVICE_DRIVER” error for good.

