

Read on for instructions on the simplest ways to completely remove problematic drivers from Windows 10/11 in this post.
Have you ever wanted to uninstall a lot of device drivers because they were all obsolete or irrelevant? For instance, you might want to completely uninstall or remove your Windows driver. However, you are unable to remove the driver from your Windows 10/11 computer because it has an automatic backup feature. When device drivers become outdated or damaged, Windows 10’s feature prevents users from removing them and automatically restores them.
Drivers that are unwanted, improperly installed, or out-of-date must be removed from your Windows 10 computer. Despite the fact that Windows 10’s automatic backup feature indicates there are no driver problems, you continue to experience problems like system freezes and blue screens of death (BSOD).
Even so, there are a few techniques you can use to handle the situation and completely remove the undesirable drivers from your Windows 10/11 system. Here we’ll discuss all such solutions
Methods to Remove or Uninstall Device Drivers on Windows 10/11
Below are some ways that you can use to remove and uninstall device drivers on Windows 10. You can, however, install their different and more stable version again if you want.
1. Completely Remove a Device Driver
This method is used to completely remove or uninstall drivers on Windows 10. It is quite a long, technical, and time-consuming method to delete drivers on Windows 10. Here we have briefly explained this method in four steps.
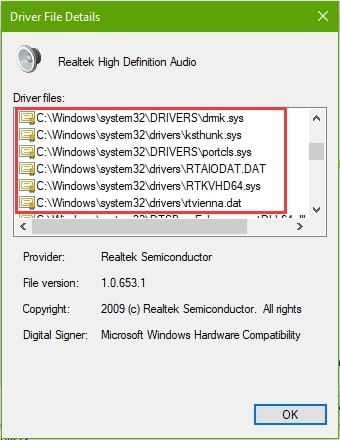
Step 1: Look for .sys files.
You first have to look for .sys files in Driver File Details. You can do it by using the Device Manager and then selecting the device properties. Then you have to look for the Inf name also.
- By following the below-mentioned steps you can get the .sys files of the drivers you want.
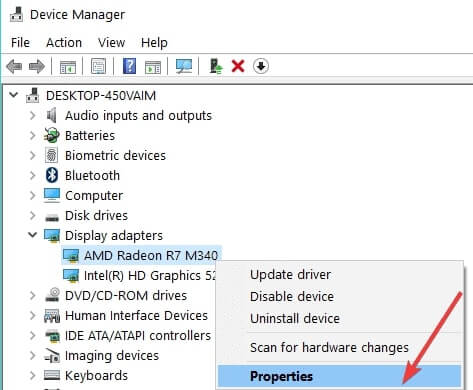
- Open the device manager and look for the device from which you want to remove the drivers.
- Double-click on that device to open its properties.
- Then click on the “Driver” tab.
- Click on “Driver Details”.

- From Driver File Details check .sys files and write them in c:\windows\system32\drivers.
- Now go back to the device properties again and click on the “Details” Tab.
- Look for the inf name.
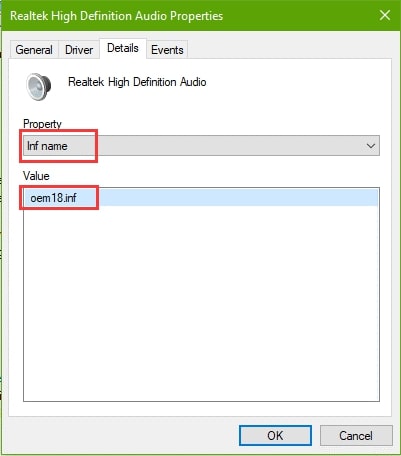
- Then write down the inf name that is showing in the “Value”
- At last, look for that corresponding folder in C:\Windows\System32\DriverStore\FileRepositor
Step 2. Look for the driver backup files
In this step, you are required to generate a .txt file to check all the information that we have gathered in the previous step. After that, you need to scroll down in the .txt file to the driver details you want to remove. Now look for the folder with the exact original name in C:\Windows\System32\DriverStore\FileRepository to get the driver backup files.
- To look for the driver backup files you can follow the below-mentioned steps:
- Search cmd and press enter.
- Now right-click the icon and go for “run as administrator”.
- Type “pnputil /enum-drivers > c:\drivers.txt” and press enter.
- Now look for the .txt file that has been generated and check the information that we have gathered in Step 1.
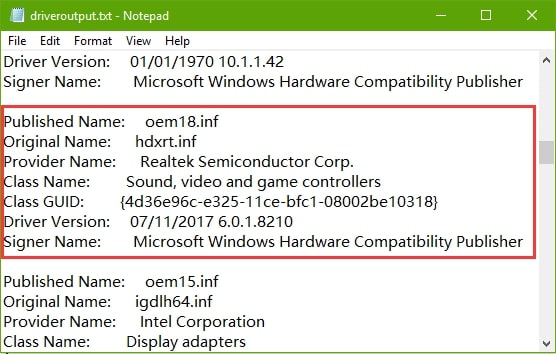
- Now take the original name.
- Look for the folder with the exact original name in C:\Windows\System32\DriverStore\FileRepository
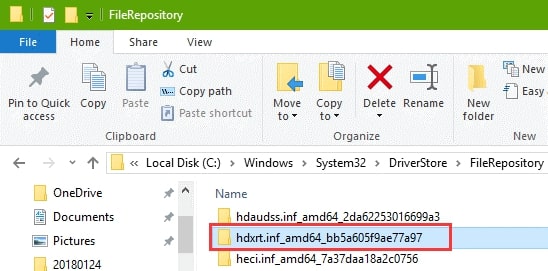
You’ll have the driver backup files after following the above steps.
Now you can delete those driver-related files if you have access to change them. But if you do not have any access, then you are required to take full control of those files. For that, right-click on the file and then select properties. Then, through properties, you can disable inheritance and get full control of those files.
Here are the detailed steps, following which you can get full control over the driver-related files.
- To get full control of those files, right-click on that respective file.
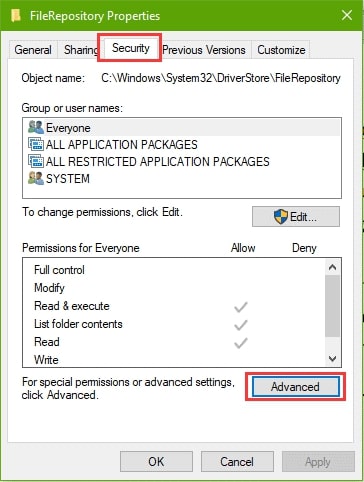
- Select properties.
- Click on the “Security” tab.
- Now click on the “Advanced” button.
- Select “Change” and type your Windows account.
- Click Ok and after that select the “Change permissions” button.
- Select “Disable inheritance”.

- Go for “Remove all inherited permissions from this object.”
- Click on the “Add” button.
- Click on “Select a principal”.
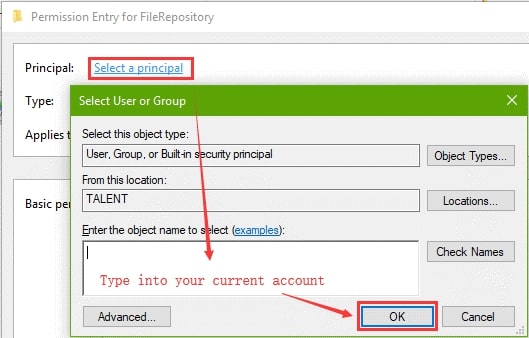
- Now enter your current account and click “OK”.
- Select “Full Control”.
- Select “Only apply these permissions to objects and/or containers within this container.”
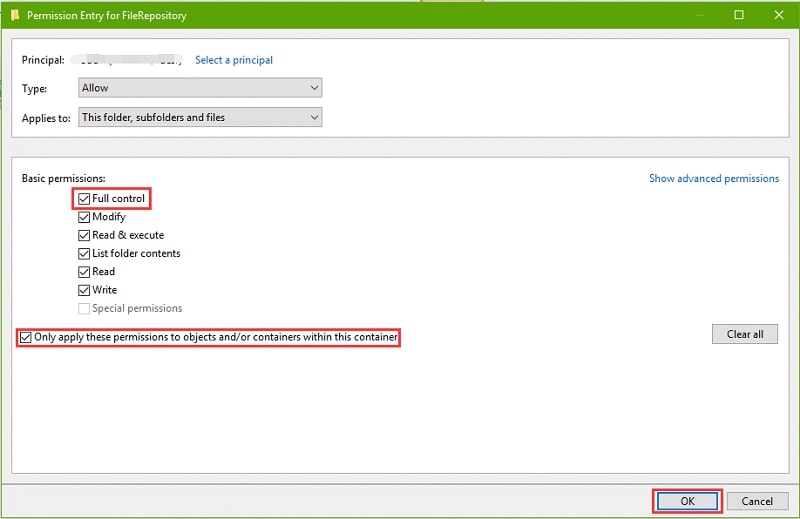
- At last, click “OK”.
Now you are having full control of those particular driver-related files.
At last, you are required to delete all the driver-related keys through Registry Editor, you can open it by typing “regedit” into the run command. Then in Registry Editor expand the following path HKEY_LOCAL_MACHINE\SOFTWARE\Microsoft\Windows\CurrentVersion\Setup\PnpLockdownFiles. Now look for the related driver keys and delete them.
To delete the driver keys follow these steps.
- Press Win+R.
- Type “regedit” and press Enter to open the Registry Editor.
- Now expand the following path HKEY_LOCAL_MACHINE\SOFTWARE\Microsoft\Windows\CurrentVersion\Setup\PnpLockdownFiles
- Look for those driver-related keys.
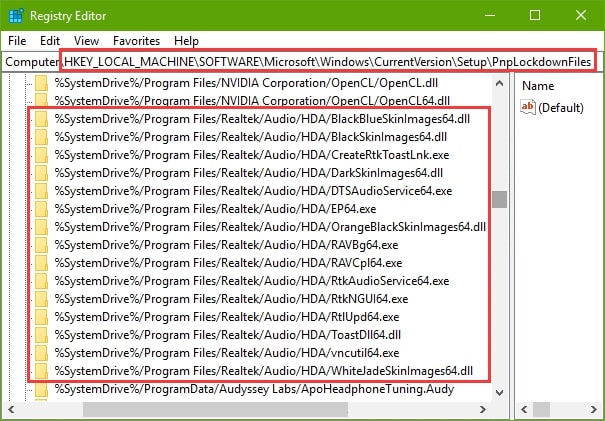
- Right-click on those files and delete them.
As the above process is quite tedious and time-consuming you can simply install any good driver uninstaller tool, such as IObit Uninstaller 7 Free, Driver Talent, etc. These tools can help you completely uninstall a driver on Windows 10.
Also know: Registry Cleaner Software for Windows
2. Uninstall a Driver Via Windows Default Program Uninstaller
If you have installed or added a device to your PC through an installer, then the best and quickest method to uninstall a driver on Windows 10 is to use the system’s default uninstaller program. Through this method, you can uninstall the driver completely, just like any other program or piece of software on your PC. Here are the steps to completely remove a driver on Windows 10.
- Click on Start.
- Search for “uninstall a program” and select the first search result.
- After that go through the list of programs and drivers and double-click the on program or driver that you want to remove completely on your Windows 10 PC.
- Click on “Yes” to start the uninstallation process.
- Once it gets completed reboot your system.
You can completely uninstall or remove the drivers on your Windows 10 PC by following the above steps.
3. Roll Back to a Previous Driver
As the name suggests, this technique allows you to switch back to the previous version of your driver, which we assume was the much more stable one. Let’s assume that you want to switch to a previous version of your printer driver. You can follow the below-mentioned steps to roll back to a previous version of the driver on Windows 10.
- Click on Start, or the Windows icon that is at the bottom left corner of your screen.
- Then search for Device Manager and click on the top search result.
- Click on “Printers” or any other device to expand its categories.
- After that, right-click on the printer device for which you want to switch to a previous version of the driver.
- Select “Properties.”
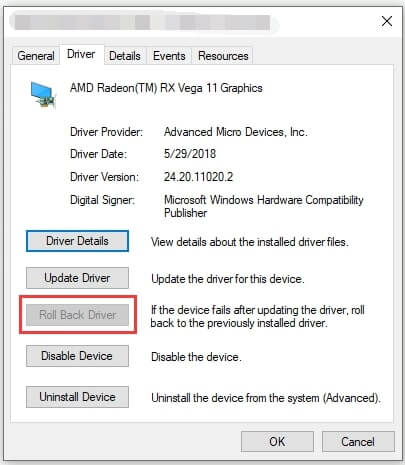
- Then select the “Driver” tab.
- Now click on the “Roll Back Driver” button.
- Now you are required to select a reason why you want to roll back to the previous version of the driver; select any one of them and click the “Yes” button.
- At last, restart your Windows PC.
By following the above steps, you can switch back to the previous version of any of your drivers and uninstall the current problematic version or remove the drivers from Windows 10/11.
4. Use the Device Manager
In this case, if the device does not have an uninstaller or the uninstaller is not appearing in the list of programs and drivers, you can completely remove the driver on Windows 10 through the device manager by following the steps mentioned below.
- Click the Start icon.
- Search for “Device Manager” and select the top search result.
- Double-click on the device on which you want to remove the driver.
- Right-click on the driver you want to uninstall.
- Select “Uninstall”
- Windows will ask for your confirmation; select “Yes” to delete the driver on Windows 10.
- Once the uninstallation process is complete, restart your PC to make the uninstallation of the driver effective.
You can use the above-mentioned methods on Windows 10 to uninstall the driver you want. However, after removing the drivers on Windows 10, if you re-install them again and want to keep them updated, you can use some of the best driver updater tools, such as Bit Driver Updater.
5. Use Programs and Features
You can use the Programs and Features present in the Control Panel to completely remove a driver from the Windows 10 computer. Here are the directions for the same.
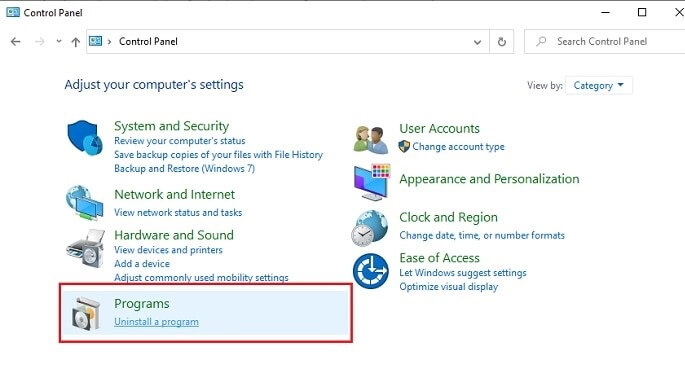
- In the search box of your computer, type “Control Panel” and click on the top result.
- After the Control Panel comes up on the screen, select “Programs and Features” from the options that you see.
- Right-click on the driver that you wish to remove from your PC and choose “Uninstall.”
- Click on “Yes” to begin the driver uninstallation.
- After the driver uninstalls, restart the computer.
6. Find & Remove Old Device Drivers Using Command Prompt & Device Manager
Sometimes, the old drivers do not show up when you try to remove them from your PC. Hence, first of all, you have to find them. Here is how you can find and delete the old device drivers on Windows 10.
- In the search box of your computer, type Command Prompt.
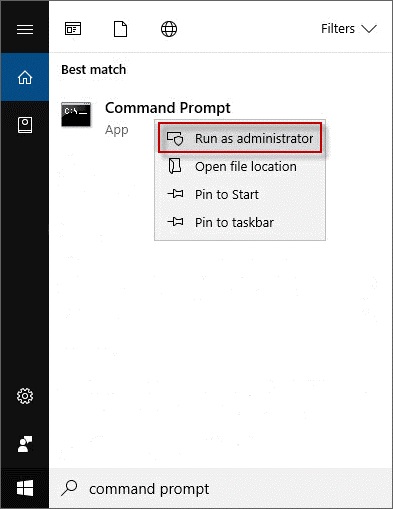
- Run it as administrator.
- In the Command Prompt, type the below command.
SET DEVMGR_SHOW_NONPRESENT_DEVICES=1 - Press Enter key on the keyboard.
- Now, close the Command Prompt window.
- After closing Command Prompt, open Device Manager. You can do it by typing Device Manager in the search box of your PC.
- In Device Manager, click the View tab.
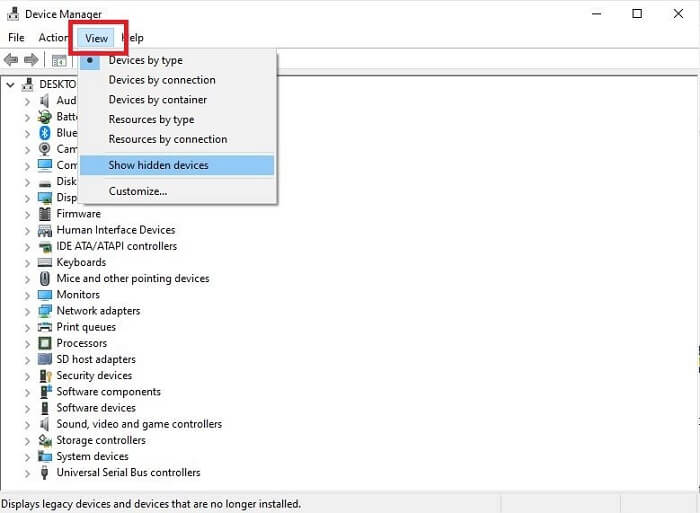
- Then, select the Show hidden devices option.
- Now expand the device categories and you can easily find the old hidden drivers as they are already faded out.
- Right-click on the driver.
- Select “Uninstall device/driver.”
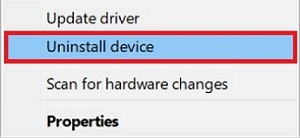
- Windows will ask for your confirmation. Select “Yes” to delete the driver on Windows 10.
- Once the uninstallation process gets completed, restart your PC to make the uninstallation of the driver effective.
Also know: Best Uninstallers for Mac
7. Use Display Driver Uninstaller Program To Remove Graphics & Audios Drivers
If you want to remove the graphics and audio drivers from your Windows 10/11 PC easily, then you can do it via DDU. DDU stands for Display Driver Uninstaller program. It is a free Guru 3D application to uninstall display and sound drivers easily. Here is how you can completely remove the driver on Windows using the DDU tool.
- Boot your Windows PC in Safe Mode.
- Now, run DDU.
- After that, choose whether you want to delete GPU or Audio driver from your PC.
- Once you have selected the device type, choose the Clean and restart option.
Completely Removed/Uninstalled Drivers on Windows 10/11
Finally, we hope that the information in the aforementioned article has assisted you in removing any improperly installed drivers from your Windows 10/11 computer. For the smooth operation of your devices, it’s critical that your PC has functioning drivers. Therefore, keep an eye on them, update any that are out of date, and remove any unnecessary drivers from your Windows 10 computer.