
Is there anything worse than realizing that your Windows computer or laptop’s speakers are not working just when you are trying to enjoy your favorite music or watch a movie? We’ve all been there, and it can be incredibly frustrating. But fear not! In this article, we will guide you through the step-by-step process of fixing speakers that are not working on your computer.
Speakers are an essential component of any computer or laptop, as they allow us to listen to music, watch videos, play games, and engage in various other audio activities. However, sometimes these speakers may stop working due to several reasons, such as driver issues, incorrect audio settings, or hardware problems.
So, if you’re facing this issue on your Windows PC or laptop, do not worry, as there are several methods to fix it. In this article, we will outline each method in detail, explaining their work to help you troubleshoot and get your speakers to work again. So, without further delay, let’s dive in.
How to Fix Windows PC/Laptop Speakers Not Working
In this article, we will walk you through some of the most common solutions to fix your speakers and get them working again. From simple troubleshooting steps to more advanced techniques, we have got you covered. So, read on to discover how you can resolve the issue and regain the joy of hearing crisp and clear sound from your speakers once more.
Solution 1: Check Speaker Connections
The first step is to ensure that your speakers are properly connected to your PC or laptop. Start by checking the speaker cables, making sure they are securely plugged into the correct ports. If you are using external speakers, verify that the power supply is connected and turned on.
Solution 2: Adjust Speaker Volume and Settings
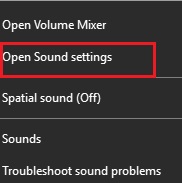
Sometimes, the speakers may not work due to incorrect volume settings or muted audio. To adjust the volume, right-click on the speaker icon in your taskbar and select “Open Volume Mixer” or “Open Sound Settings.” Ensure that the volume levels are appropriately set and that no audio channels are muted or turned down to zero.
Also see: How to Download & Update Speaker Drivers on Windows PC
Solution 3: Update audio drivers
Obsolete or incompatible audio drivers can prevent speakers from working properly. To update the audio drivers, follow these steps:
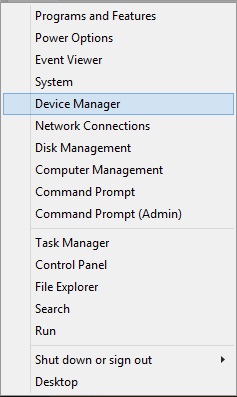
- Press the Windows key + X simultaneously and select “Device Manager” from the menu.
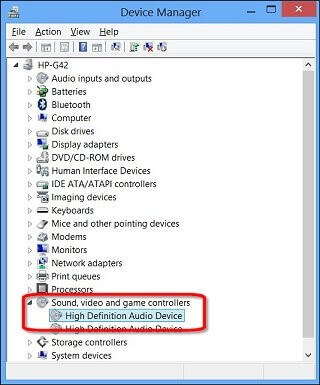
- In the Device Manager window, expand the “Sound, video, and game controllers” section.
- Right-click on the audio driver and choose “Update driver” or “Search automatically for updated driver software.”
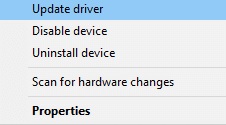
- Windows will search for and install the latest driver available for your speakers. Follow the on-screen instructions to complete the process.
You can also update the audio driver using the Win Riser Driver Updater software. Follow the steps below to proceed:
- Click the following link to download and install Win Riser Driver Updater.

- Once installed, launch the Win Driver Updater tool by double-clicking on its desktop icon or finding it in the Start menu.
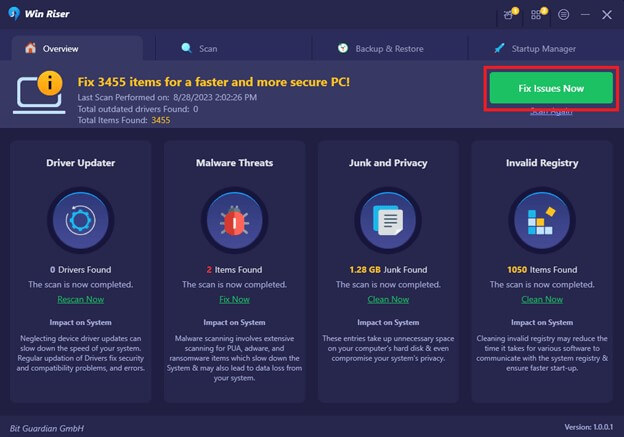
- After opening the tool, it will automatically start scanning your system for outdated or missing drivers. Wait for the scan to complete.
- Once the scan is finished, the tool will display a list of all the outdated drivers on your PC, including the audio drivers.
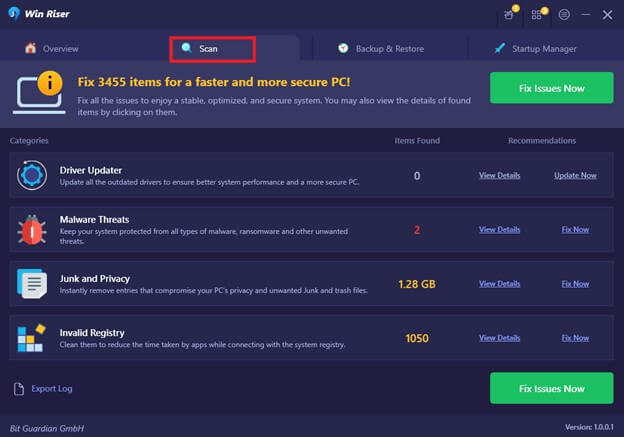
- Locate the audio driver in the list, which may be labeled as “Sound,” “Audio,” or similar.
- To download and install the audio driver, click on the “Update” or “Download” button next to it. This action will initiate the driver download process.
- The Win Driver Updater will then start downloading the latest version of the audio driver from a trusted source. It may take some time to complete the download, depending on your internet speed.
- Once the download is finished, the tool will automatically install the downloaded audio driver. This process may require your permission to proceed.
- Wait for the installation process to complete. The tool will display a confirmation message once the driver installation is successful.
- Finally, restart your computer to apply the changes and make sure the audio driver is properly installed.
Solution 4: Run the Windows troubleshooter
Windows provides a built-in audio troubleshooter tool that can detect and fix common audio issues automatically. To use it, proceed as follows:
- Type “Troubleshoot” in the Windows search bar and select “Troubleshoot settings.”
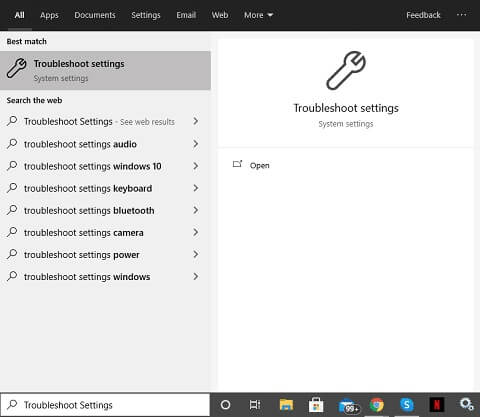
- Scroll down and under “Find and fix other problems,” click on “Playing Audio.”
- Click on “Run the troubleshooter” and follow the instructions provided.
- The troubleshooter will attempt to identify and resolve any issues related to your speakers. If any problems are detected, it will provide suggestions or perform fixes automatically.
Also see: How to Download, Update, and Install Beats Audio Drivers on Windows PC
Solution 5: Set default audio device
Sometimes, the audio output may be set to a different device, causing the speakers not to work. Setting the correct default audio device can often solve this issue:
- Right-click on the speaker icon in the taskbar and select “Open Sound settings.”
- Under the “Output” section, click on the drop-down menu and select the correct audio device (e.g., speakers or headphones).
- Ensure the volume slider is set to an appropriate level.
- Test your speakers by playing some audio to verify if they are working correctly.
Solution 6: Check third-party audio software
If you have installed any third-party audio software or equalizers, they may interfere with the proper functioning of your speakers. It is recommended to disable or uninstall such software temporarily to diagnose the issue:
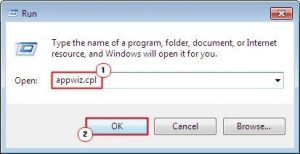
- Press the Windows key + R simultaneously to open the Run dialog box.
- Type “appwiz.cpl” and hit Enter to open the Programs and Features window.
- Locate any audio-related software installed on your system. Right-click on it and select “Uninstall” or “Uninstall/Change.”
- Restart your computer and check if the speakers are working without the third-party software.
Solution 7: Disable Audio Enhancements
Certain audio enhancements or effects provided by your sound card drivers could conflict with the speakers and lead to issues. Disabling these enhancements can eliminate possible conflicts and fix the problem. Right-click on the speaker icon, select “Open Sound Settings,” click on “Sound Control Panel” (located on the right side), select your audio device, click on “Properties,” go to the “Enhancements” tab, and check the box that says “Disable all enhancements.”
Solution 8: Restart Windows Audio Service
Restarting the Windows Audio service can often resolve issues related to audio playback. To do this, right-click on the “Start” button, select “Run,” type “services.msc,” and press “Enter.” In the Services window, locate “Windows Audio,” right-click on it, and select “Restart.” After the restart, check if the speakers are working.
Solution 9: Hardware check
If none of the above methods resolve the issue, it’s essential to verify if there are any hardware problems causing the speakers to not work. Here are a few steps to perform a hardware check:
- Ensure the speakers are connected to a power source and turned on.
- Check for any visible damage to the speaker cables, connectors, or the speaker itself.
- Try connecting the speakers to a different device to ensure they are functioning correctly.
- If possible, try using a different set of speakers or headphones on your PC or laptop to isolate whether the problem lies with the audio output or the speakers themselves.
Speakers Not Working On Windows PC/Laptop: Fixed
Experiencing problems with your speakers not working on your Windows PC or laptop can be frustrating, but with the right troubleshooting methods, it is often possible to fix the issue. Remember, the first step is to identify the root cause of the problem by checking all the basic connections, audio settings, and hardware configurations. By ensuring that the cables are properly connected, the volume is turned up, and the correct playback device is selected, you can easily resolve any simple issues.
If the problem persists, you can further delve into advanced troubleshooting techniques. Updating or reinstalling the audio driver may prove effective, as outdated or corrupted drivers can often cause speaker malfunctions. If you still cannot fix the problem after exhausting all these options, it might be time to seek professional assistance. A computer technician or audio specialist can provide an in-depth analysis and diagnose any complex hardware issues that may be causing the speakers to malfunction.