
Wondering how to fix the Windows 10 startup repair not working issue? Here we have an effective guide that provides several helpful solutions to make the Windows 10 startup repair tool work for you again. Read on to know more.
No doubt, Windows is an amazing operating system for PCs. But it doesn’t mean that you do not have to face issues with it. There are some common problems such as booting crashes, BSOD errors, etc. that may annoy you even if you are a tech geek. One of the major fixes that people try to get rid of the Windows 10 issues is using the startup repair tool. But, what if the Windows 10 startup repair is not working properly on your system? Do not panic. Here we have come up for your rescue with this handy guide.
So, without wasting further time, let’s check out the solutions to fix the Windows 10 startup repair issue.
Methods To Fix Windows 10 Startup Repair Not Working Problem
Multiple reasons can cause the Windows 10 startup repair not work. Hence, below we have listed several solutions that can help you to fix it.
Case 1: Windows 10 Startup Repair Get Stuck
It is one of the situations that you may face when the Windows 10 startup repair is not working properly on your PC. You get stuck in the Windows 10 Startup Repair loop as your PC keeps on booting into the Startup Repair tool and doesn’t allow you to perform anything, which makes the situation even worse. But relax as you can get rid of this Windows 10 Startup Repair loop by following the below-provided solutions.
Method 1: Disable Automatic Restart After Startup Repair Failure
One of the easiest ways to avoid the Windows 10 Startup Repair loop is to disable the automatic restart after Startup Repair failure. Here are the instructions that you have to follow to resolve the Startup Repair issue on your Windows 10 PC using this method.
- First of all, restart your Windows 10 PC.
- While restarting the computer, you have to press Shift + F8 keys on your keyboard. This needs to be done before the Windows starts loading, or we can also say, before the Windows logo appears.
Note: If the above step does not work in the first attempt and Windows starts loading, then you have to restart it again and try the above step again as well.
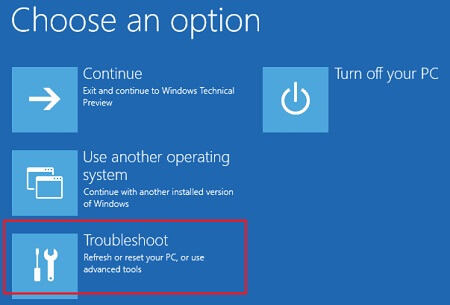
- After that, you’ll see multiple booting options. Choose the Troubleshoot option.
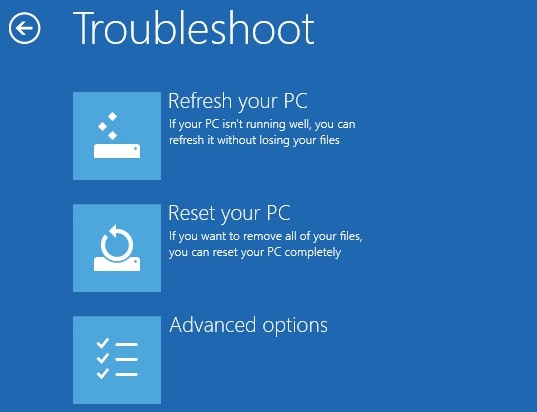
- Now, you have to select Advanced options.
- In the Advanced options menu, choose Startup Settings.

- After that, press F9 on your keyboard to disable automatic restart after failure.

Now, let your system boot again and check if the Win 10 startup repair loop issue persists or got fixed. If it still exists, then try the other solutions mentioned here to fix it.
Method 2: Try Running The CHKDSK Command
You can also fix the Windows 10 Startup Repair not working issue by performing the CHKDSK command. If you are stuck with the Startup Repair tool and facing the Windows Startup Repair loop problem, then this is a great way of getting rid of the issue. Here are the required steps following which you can perform the CHKDSK command on your PC.
- You have to access the Command Prompt to run the CHKDSK command. And as you are unable to boot your PC properly, hence, you need to access the booting menu to open the Command Prompt. So, the first step that you have to follow is to restart your Windows 10 PC.
- While restarting the computer, press Shift + F8 keys on your keyboard before the Windows logo appears. You can perform this multiple times if it does not work in the first attempt.
- After that, choose the Troubleshoot option from the multiple booting options appearing on your screen.
- Then go to the Advanced options and select it.
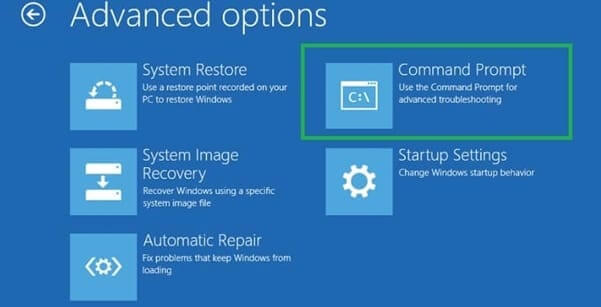
- Open Command Prompt from the Advanced options menu.
- In the Command Prompt, type chkdsk c: /r and press enter to run the command.
- After performing the command successfully, close the Command Prompt window and reboot your system.
Method 3: Try Rebuilding The BCD/Repairing The Boot Sector
Another helpful way for resolving the issues related to the Windows 10 Startup Repair tool is rebuilding/repairing the BCD or Boot Sector files. You can do it by performing some specific commands. Below are the essential steps to rebuild BCD files and fix Windows 10 Startup Repair not working problem.
- If you are stuck with the Startup Repair look, then restart your Windows 10 PC.
- And during the restart process, you have to press the Shift + F8 keys on your keyboard before the Windows starts loading.
- Once you do it, you’ll see multiple booting options. You have to select the Troubleshoot option among them.
- Now, you have to select Advanced options.
- Select Command Prompt and open it.
- After opening the Command Prompt window, you have to enter the Bootrec /fixmbr
- Once you provide the above command, press the Enter key on your keyboard.
- Now, type Bootrec /fixboot & then hit the Enter key on your keyboard.
- At last, type the Bootrec /rebuildbcd command and implement it by pressing the Enter key.
- And after completing the above steps, reboot your system and check if the Startup Repair tool issue still exists or got fixed.
Case 2: Windows 10 Automatic Repair couldn’t repair your PC (Error Message)
Here comes the other possible situation that you may face when the Windows 10 Startup Repair is not working on your PC. You may see the ‘Windows 10 Automatic Repair couldn’t repair your PC’ error message while using the Windows Startup Repair tool. But do not worry as this issue also have multiple solutions. Below we have discussed them.
Method 1: Perform sfc /scannow Command
Problematic system files can also result in the Windows 10 Startup Repair not working issue. Hence, if it is showing you the ‘Windows 10 Automatic Repair couldn’t repair your PC’ error message, then you must try fixing your system files. Performing the sfc /scannow command can help you in repairing your system files. Here we have listed the steps that you should follow to appropriately perform the sfc /scannow command.
- As we have done in several above methods, reboot your PC.
- When it starts booting, press the Shift + F8 keys on your keyboard to open the Windows startup menu. You have to do it before the Windows starts loading.
- Now, go to the Troubleshoot option and select it.
- In the Troubleshoot menu, choose the Advanced options.
- Select Command Prompt and open it.
- In the Command Prompt, type the below command and press the Enter key to run it.
sfc /scannow /offbootdir=d:\ /offwindir=d:\windows - After the successful completion of the command, you have to restart your Windows 10 PC and check if the Windows 10 Startup Repair is still not working or the problem has got resolved now.
Method 2: Disable Anti-malware
Sometimes, the Windows 10 Startup Repair not working problem also arises because of the early launching of anti-malware programs. When you boot your PC, these anti-virus programs also get launched automatically and may cause troubles in your Windows startup process and tools like Startup Repair. Hence, if you have started facing the issue after downloading and installing an anti-malware, then you should try to disable the program and fix the Startup Repair problem.
Below are the steps that you can help you out in disabling the early launching of anti-malware software.
- Restart the computer and access the booting options by pressing Shift + F8 keys before the Windows logo appears.
- Now, same as the above methods, choose the Troubleshoot option.
- After that, you have to select Advanced options.
- Select Startup Settings and open it.
- Once you see the Startup Settings options, press F8 to disable early launch anti-malware protection.
After disabling the early launch anti-malware protection, boot the system again to check if the problem persists or got resolved.
Method 3: Boot In Safe Mode & Update PC Drivers
Some experts also feel that the Windows 10 Startup Repair issue is a result of outdated PC drivers. Hence, one can also fix it by upgrading the hardware drivers. But first of all, you have to boot your system in the Safe Mode. To do it, you can follow the steps provided below.
- Start/Restart your PC.
- Once it starts booting, use the Shift + F8 keys of your keyboard altogether to access the booting options.
- After that, you’ll see multiple booting options. Choose Troubleshoot among them.
- In the next menu, you have to go with the Advanced options.
- Now, choose the Startup Settings option.
- In the Startup Settings menu, select the Enable Safe Mode with Networking option by pressing the F5 key of your keyboard.
Now, as you have booted your PC in safe mode, you can update your system drivers. However, not all of us are tech experts, and hence some of us may face difficulties in upgrading our hardware drivers.
But relax as we have come up with a solution that anyone can use to fix driver issues on his/her Windows 10, 8, or 7 PC. Bit Driver Updater is an advanced driver updating tool along with an extremely simple interface. Hence, even a child can use this tool to update computer drivers. Here are the steps that one can take to use the Bit Driver Updater program appropriately to fix system drivers, & eventually, the Windows 10 Startup Repair not working issue.
- If you are looking for a solution to fix Windows 10 Startup Repair issue, then download Bit Driver Updater from the button given below.

- After that, install the program setup.
- Once you install it, run the tool on your Windows PC and start scanning for faulty drivers and issues related to them by clicking on the Scan Drivers option.
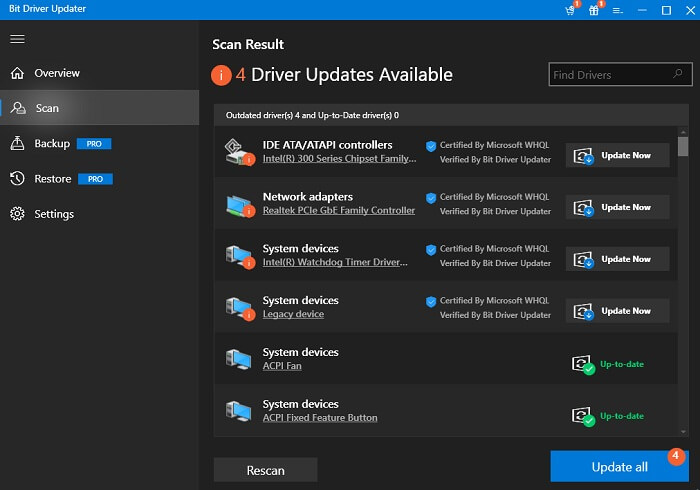
- Then, when you get a list of faulty drivers, fix them by clicking on the Update Now button.
Also Know: Your PC Ran into a Problem and Needs to Restart: Fixed
Windows 10 Startup Repair Not Working Issue [Fixed]
So, that’s how you can fix the Windows 10 Startup Repair not working problem. All the methods that we have mentioned above are quite situation-specific. Hence, you have to evaluate the situation before using any of them. Once you have analyzed the reason for the issue, then you can resolve it with the particular solution for that specific situation mentioned above. So, whether if you are stuck with the Startup repair loop issue or getting panicked with the ‘Windows 10 Automatic Repair couldn’t repair your PC’ error message, you can use the above guide to get rid of it.