
![Headphone Jack Not Working on Windows 10 [SOLVED]](https://www.explorateglobal.com/blog/wp-content/uploads/2023/09/Headphone-Jack-Not-Working-on-Windows-10-SOLVED.jpg)
This article shares six 100% working solutions for the headphone jack not working problem on Windows 10.
Headphones are our savior when boredom begins to overpower us while we work on the computer or when we need to have a conversation with someone via the computer. And if the headphone jack is not working on Windows 10, then it is one of the most annoying things that can ever happen. If you are struggling to solve the same problem, then this article is what you need to read.
Here, we elucidate the easy and quick fixes to resolve the headphone-related issues such as Windows 10 not detecting headphones, headphones not working on PC, etc. However, before moving further, let’s answer a frequently asked question that you might also have, i.e., “Why is my headphone jack not working on Windows 10?” In case you can’t wait to know the solution to the problem, then below you can have a quick glimpse of it.
Why is the headphone jack not working on Windows 10?
There can be many reasons due to which the headphone jack is not working on Windows 10, your headphone is not recognized, or there is no sound from them. Below we list out the prominent culprits from them.
- Outdated or corrupt audio drivers.
- You have not set the headphones as default.
- Incorrect sound settings.
- You have not enabled the headphones.
- Third-party apps are interfering with the headphone’s working.
- Your headphone or headphone jack is damaged physically.
- The Windows 10 versions present on your computer is having some software issues.
Now that you are aware of what led to the audio jack not working on the Windows 10 problem, fixing it will be as simple as ABC. Let’s start troubleshooting the issue.
100% Working Fixes for the Headphone Jack not Working on Windows 10 Problem
Below are the solutions for almost all the problems related to headphones, including the headphone jack not working on Windows 10.
Solution 1: Fix the Hardware Issues
Sometimes, the problem is not at all software-related, and the hardware is the actual culprit. Therefore, the first thing that you can do if the headphone jack is not working on Windows 10 is try to plug the headphones into another device and check whether they work or not. If the headphone does not work, then it’s high time to replace the headphone with a new one.
Also Know: How to Reinstall Audio Drivers on Windows PC
Solution 2: Enable the Headphone and Set it as Default
If the headphones are not enabled or you have not set them as default, then the headphones won’t be detected on Windows 10. Therefore, follow the steps shared below to enable and set the headphones as default.
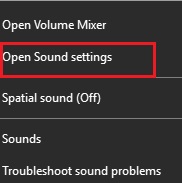
- Right-click on the volume icon that is located on the taskbar and select, “Open Sound Settings” from the small popup menu.
- After the Sound Settings window appears, find the “Manage sound devices” option and click on it.

- If your headphones are listed under the Disable heading, then click on it and choose the “Enable” option.

- Now, to set the headphones as the default device, click on the arrow to return to the Sound Settings window.
- After you come back to the Sound Settings screen, click on the “Choose your output device” option, and select your headphones from the drop-down list.

Solution 3: Change the Default Format of your Headphones
If there is no sound from headphones on Windows 10, then changing the default format can solve the problem for you. Here is how to do the same.
- Open the Sound Settings.
- Choose “Sound Control Panel” from the related settings.
- Click on your headphones and then select “Properties.”

- Move to the “Advanced” tab, choose different audio formats, and click on the “Test” button to test them one by one. Stop at the format that gives you the perfect sound.
Solution 4: Update the Audio Driver (Recommended)
Updating the audio driver is our most recommended fix for the headphone jack not working on Windows 10 problem. The reason is that the major cause of this issue is outdated drivers. You can update the driver in various ways. However, the way we recommend is an automatic driver update through Bit Driver Updater. This software updates all the drivers automatically in only one click and it also uplifts the performance of your computer. After using Bit Driver Updater, your computer becomes a lot faster and smoother.
Moreover, it downloads only those drivers that are authenticated by WHQL. Below is how to use this software.
How to update the audio driver automatically using Bit Driver Updater
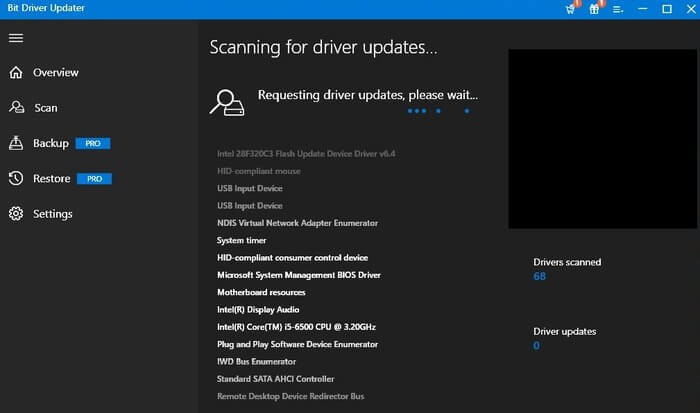
- Download and install the Bit Driver Updater software from here.

- Let the program scan your device automatically.
- After two to three seconds, when you get the scan results, click on the “Update Now” button located alongside the audio driver to update it.
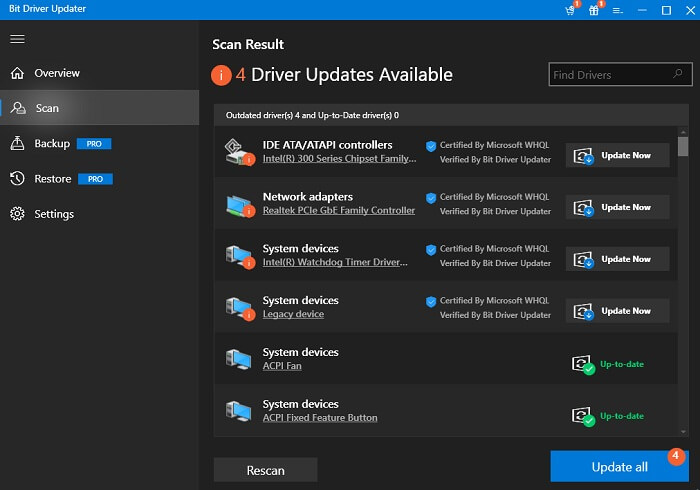
You can also choose to update all the drivers automatically in one click by clicking the “Update All” option. Doing that also gives you many useful features like driver backup and restore, driver download speed acceleration, driver exclusion from the scan, and more.
Solution 5: Change the Realtek HD Audio Manager settings
In case you are using Realtek’s software to manage the audio on your computer, i.e., Realtek HD Audio Manager, then change its settings to solve the audio jack not working issue on Windows 10. Here is how to do it.
- Launch Realtek HD Audio Manager.
- Click on the folder icon located in the upper right corner.
- Checkmark the “Disable front panel jack detection” option.
- Lastly, click the “OK” button.
Also Know: How to Fix No Sound Issue on Windows PC
Solution 6: Uninstall IDT Audio Device
In case you have previously installed the IDT Audio Device, then uninstall it to fix the PC headset not working issue. Here is the way to do the same.
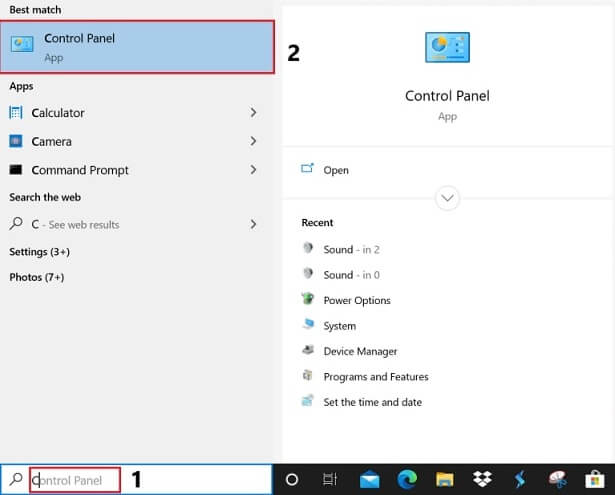
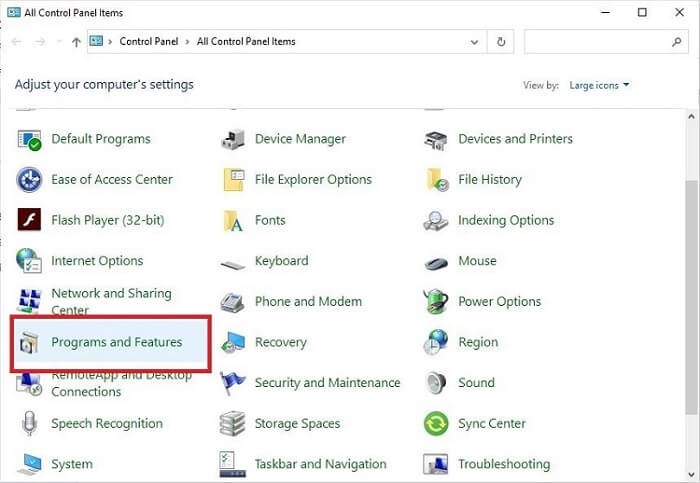
- In the search box of Windows, type “Control Panel” and select the first result.
- After the Control Panel opens, click on “View by” and select “Large icons.”
- Select “Programs and Features” from the on-screen options.
- Right-click on the IDT Audio Driver and select “Uninstall.”
- After the uninstallation completes, restart the computer.
Headphone Jack not Working on Windows 10
Through this article, we elucidated how to solve the headphone jack not working on Windows 10 problem with ease. In our view, updating the audio driver using Bit Driver Updater is the best way to resolve this issue as the problem is mainly caused by the outdated Windows 10 headphone drivers. Further, Bit Driver Updater also significantly elevates the performance of your computer. Now, it’s time to take your leave. We will be posting another useful tech guide soon.